Master File Uploads with EchoAPI: A Step-by-Step Practical Guide
Stop struggling with API file uploads. This practical guide breaks down EchoAPI's upload feature into simple, actionable steps for effortless testing.
If you’ve ever wrestled with file uploads, you know they can feel like a mini-boss battle in the API world. Luckily, I’ve spent enough time sparring with EchoAPI’s upload feature to gather the most common “what ifs” and turn them into a simple, no-headache guide. Let’s dive in.

File Upload Basics
Here are the essentials you need to know before you start:
1. Should I use multipart/form-data?
Absolutely. This is the HTTP standard for file uploads, and EchoAPI fully supports it. It splits form data and files into parts, each with its own headers — perfect for transmitting binary files.
2. Which parameter key should I use for the file?
It depends on the API. The default is often file, but you might see image, document, avatar, upload, or video. Always check the API docs. If you’re designing the API yourself, you can define the key in EchoAPI.
3. Do I need to send extra metadata?
Sometimes. Adding fields like file_name and media_type makes life easier for the backend. For example, when uploading a profile picture you might also need:
user_id: 12345type: avatar
👉 Golden rule: follow the API spec you’re testing against.
Testing File Uploads in EchoAPI
1. Create or Edit an Endpoint
- Set the method to
POST(or whatever the API requires)
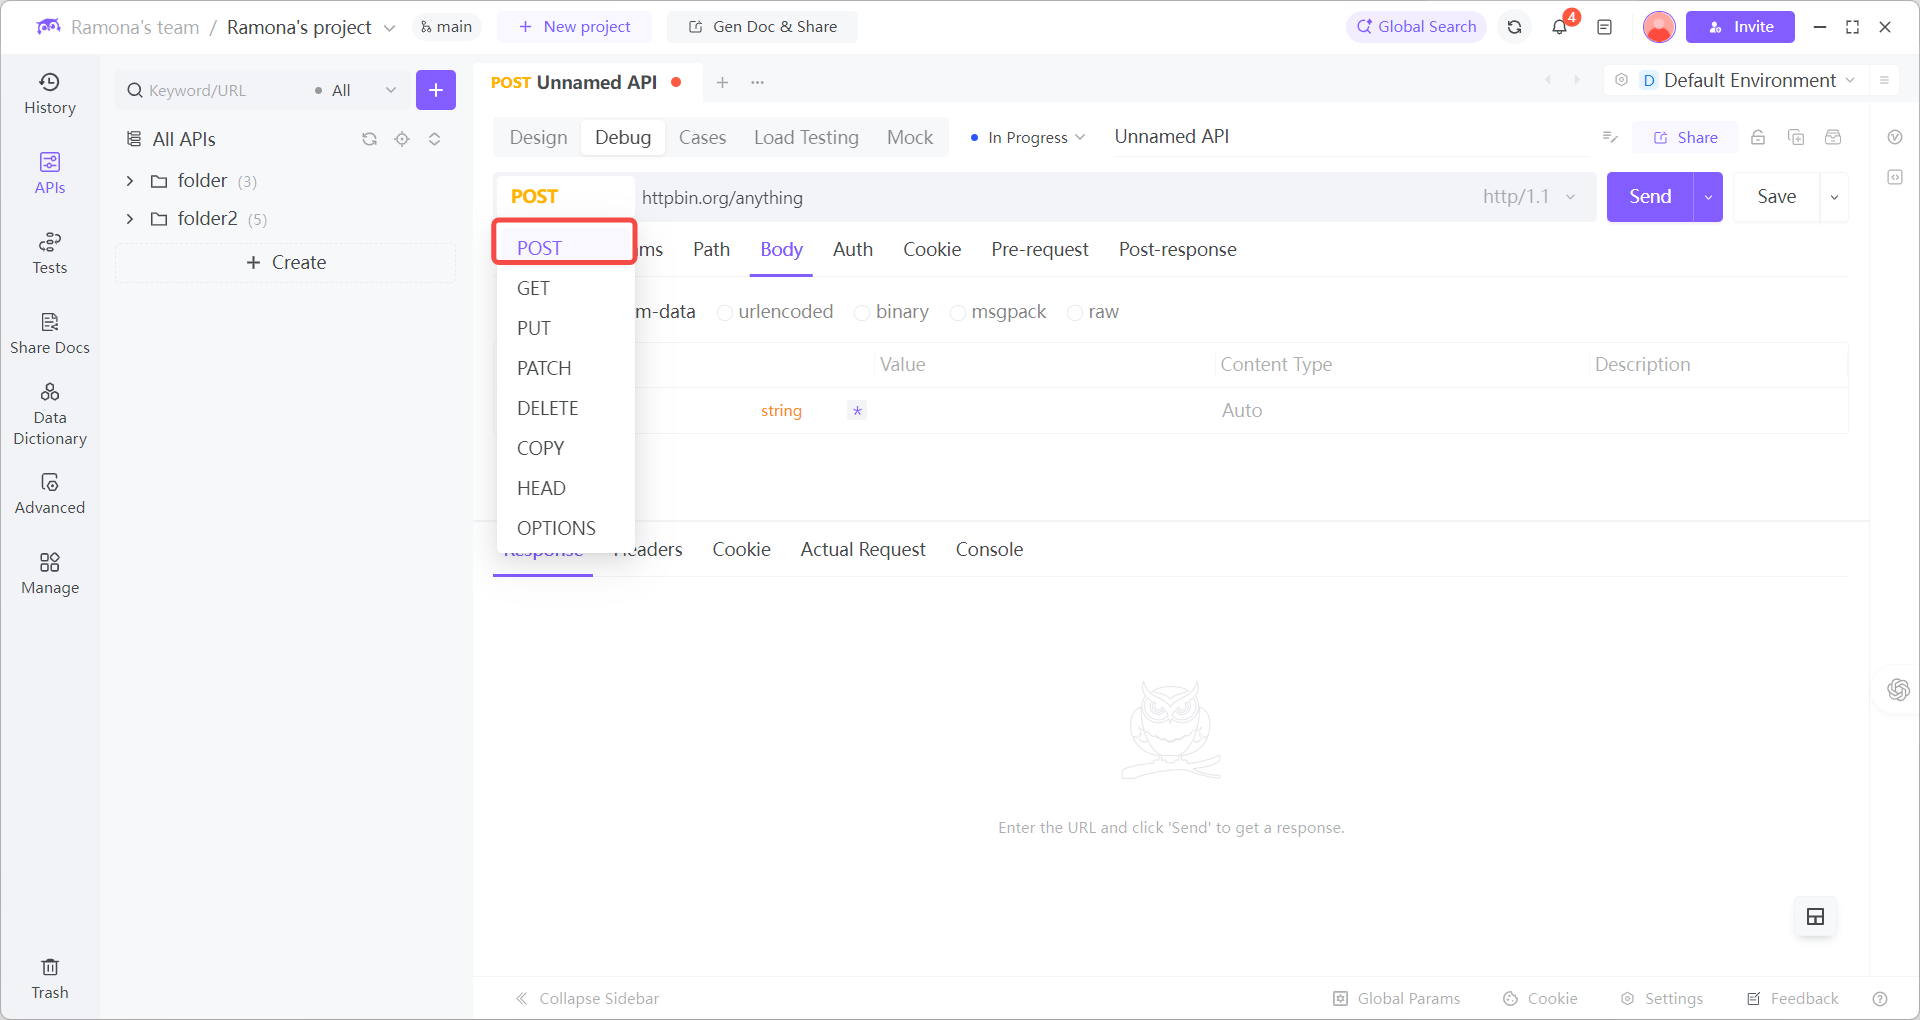
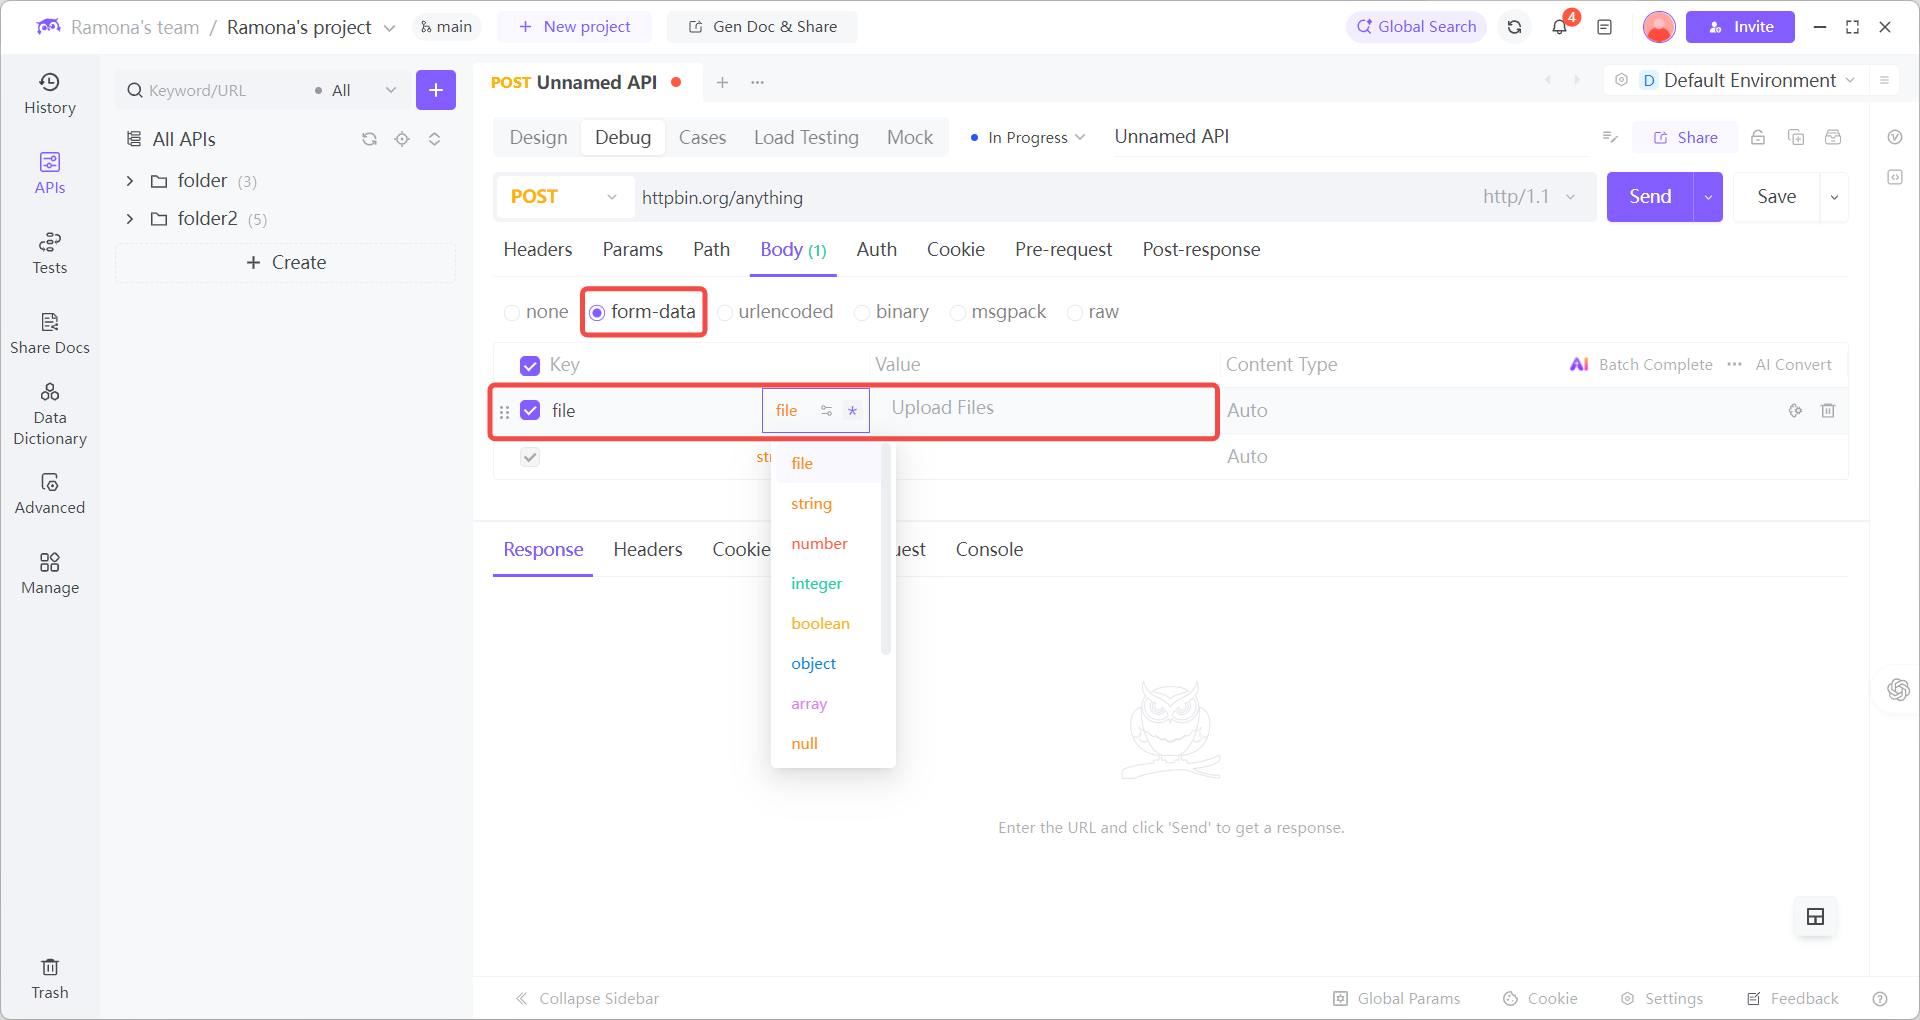
- In Parameters, click Add Parameter, choose File, and enter the field name (e.g.
file)
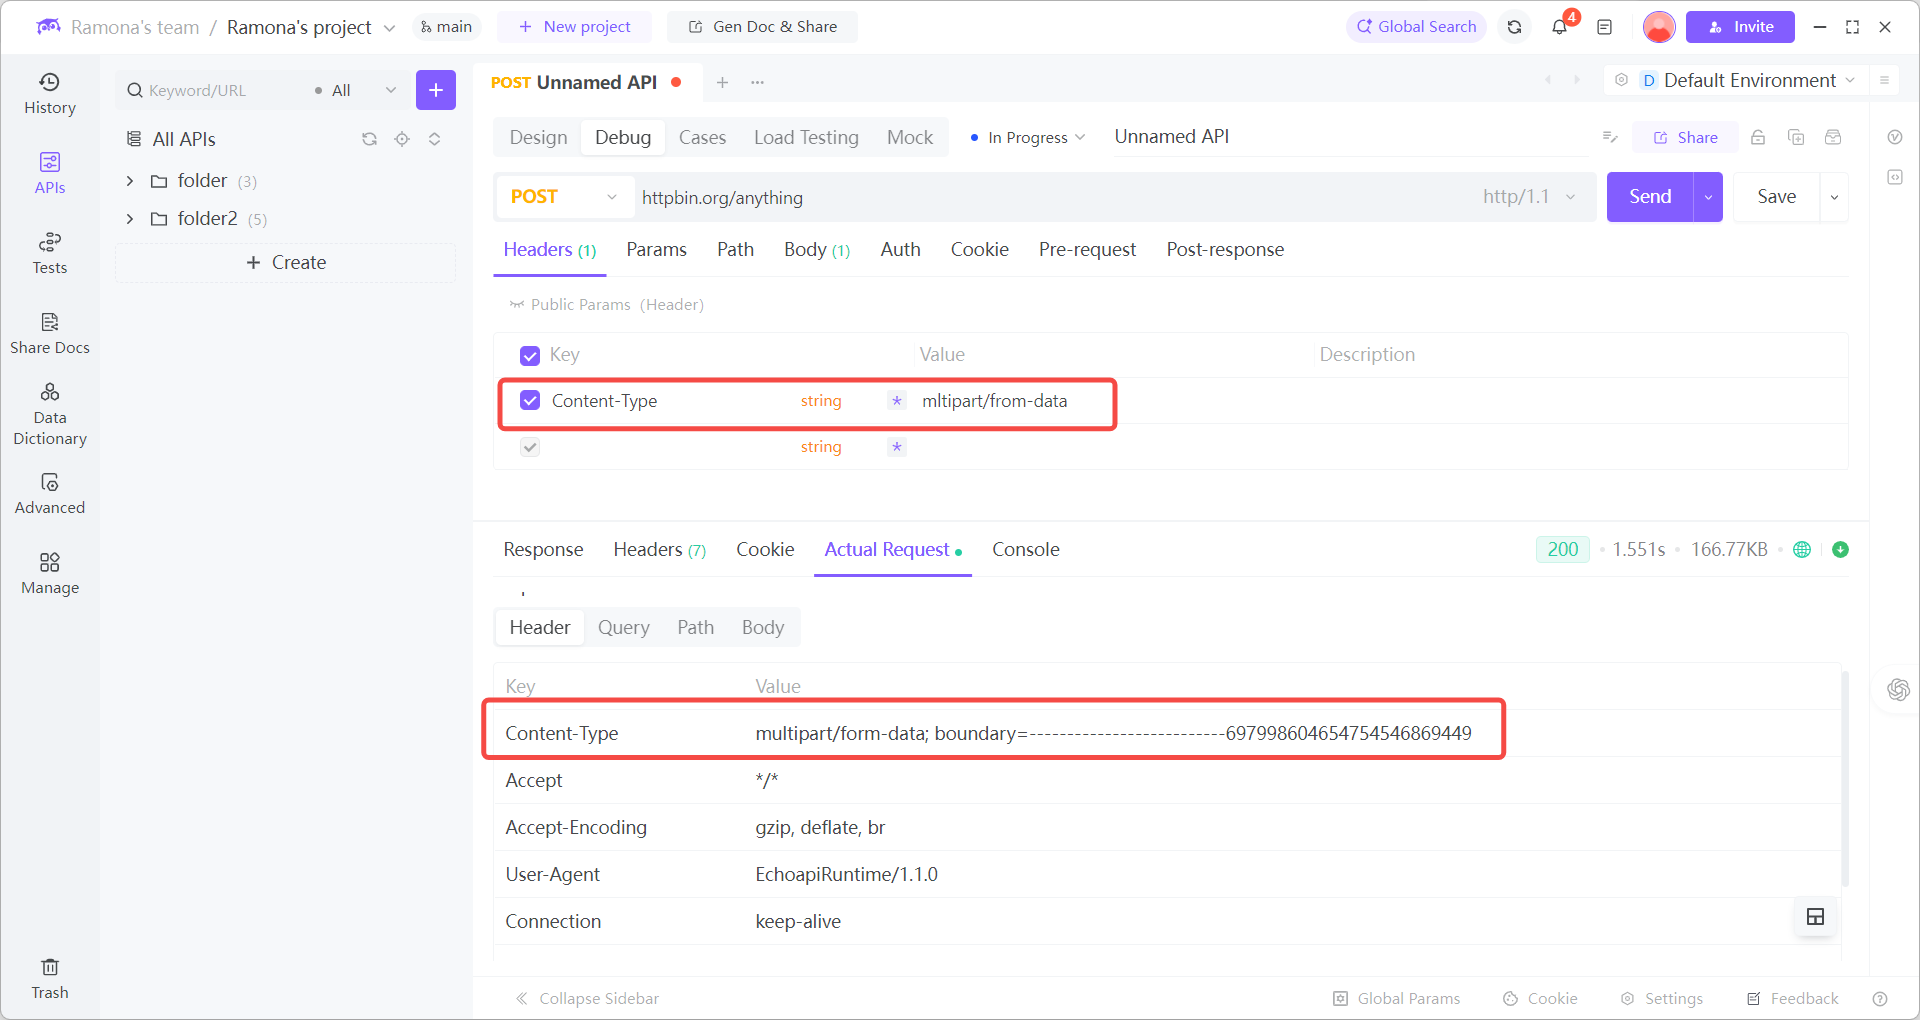
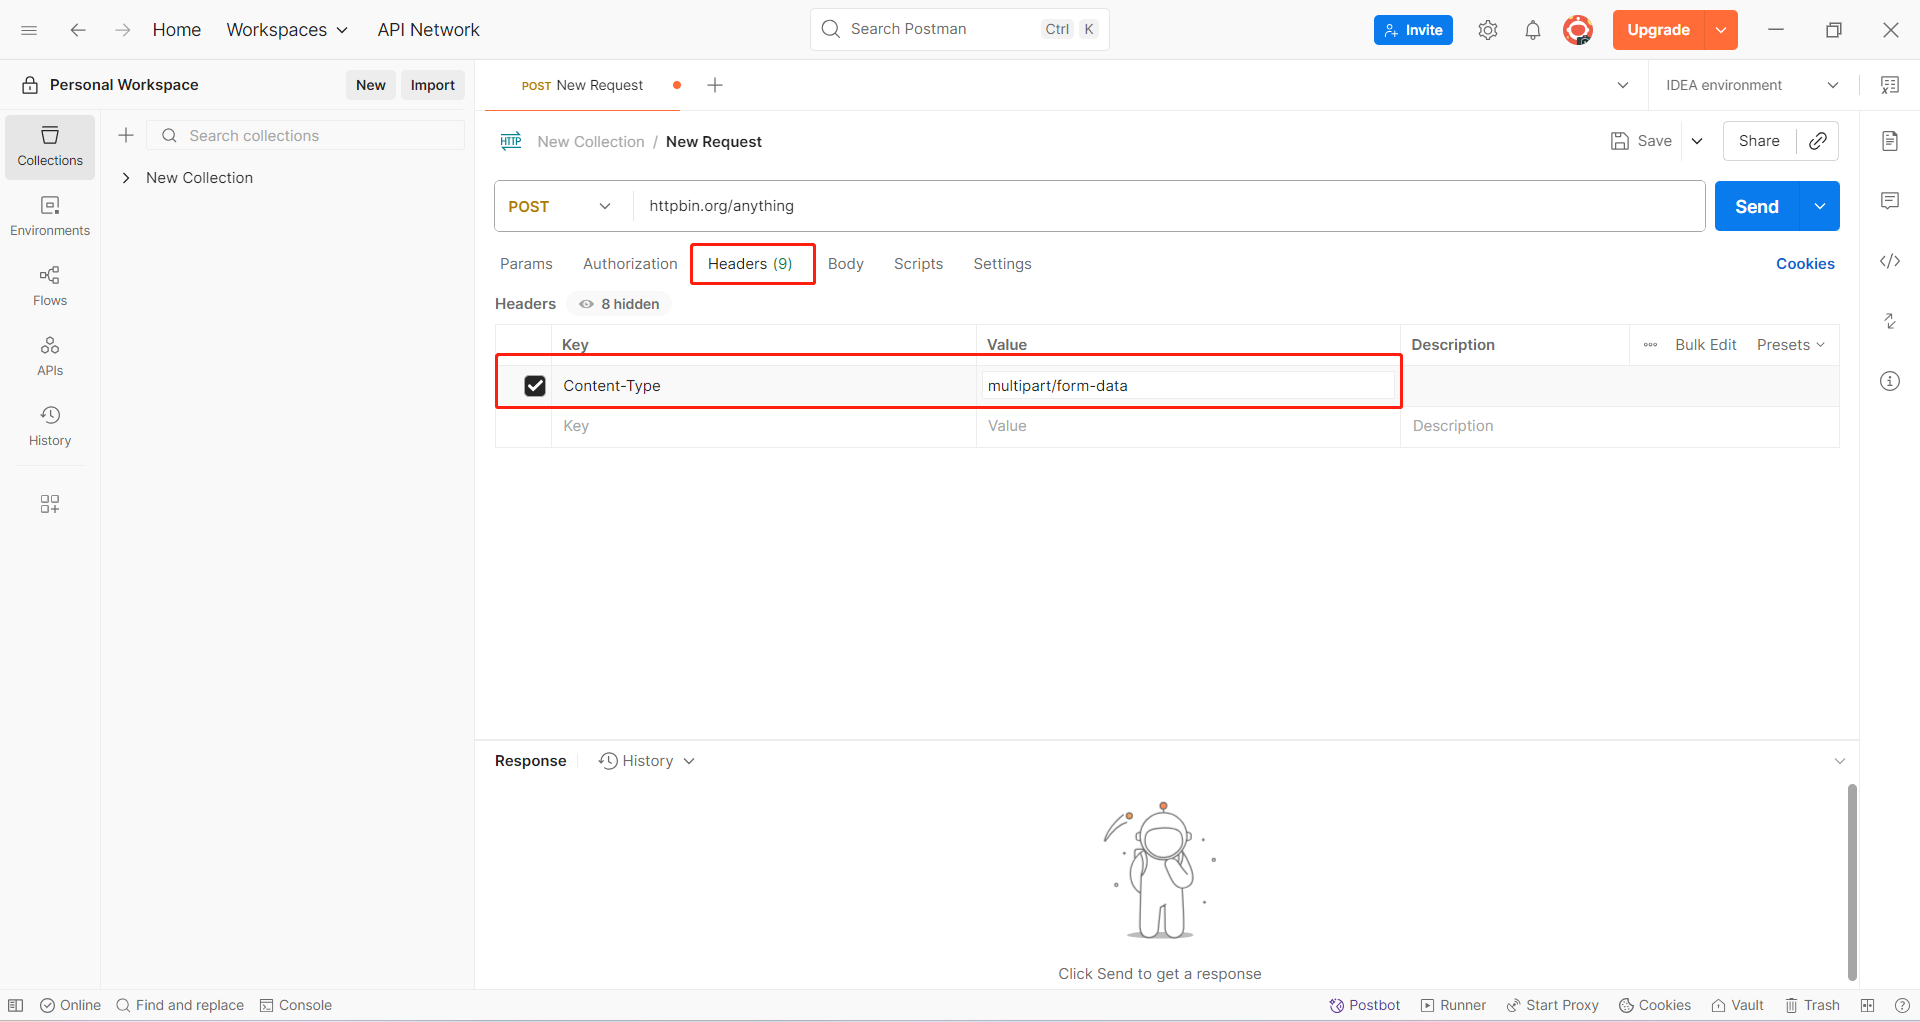
- Set Content-Type to
multipart/form-data
Don’t add this header manually. EchoAPI (and tools like Postman) automatically generate the right header with aboundary. Adding your own can cause conflicts.
Just include other headers likeAuthorization: Bearer <token>.
- Add extra metadata fields (
file_name,media_type, etc.) if required.
2. Upload the Test File
- Click Upload Files in the parameter row
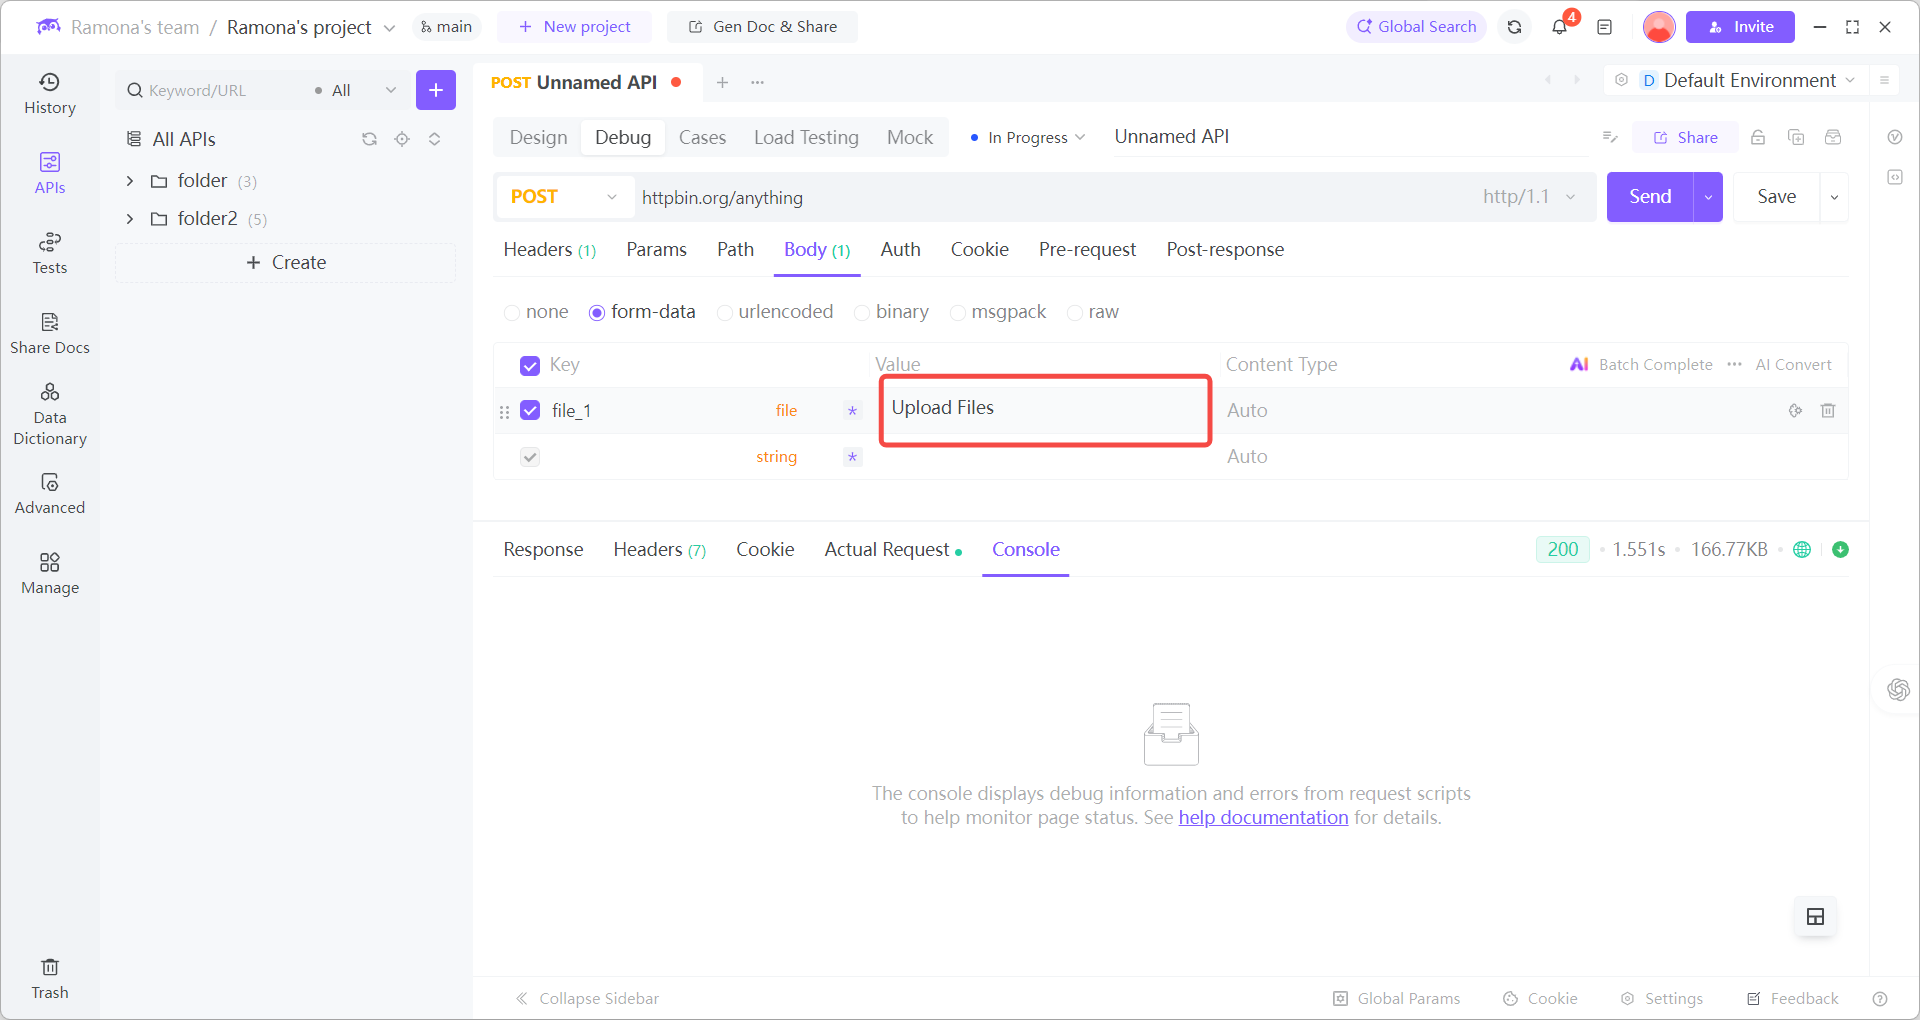
- Select your image, video, or PDF from local storage
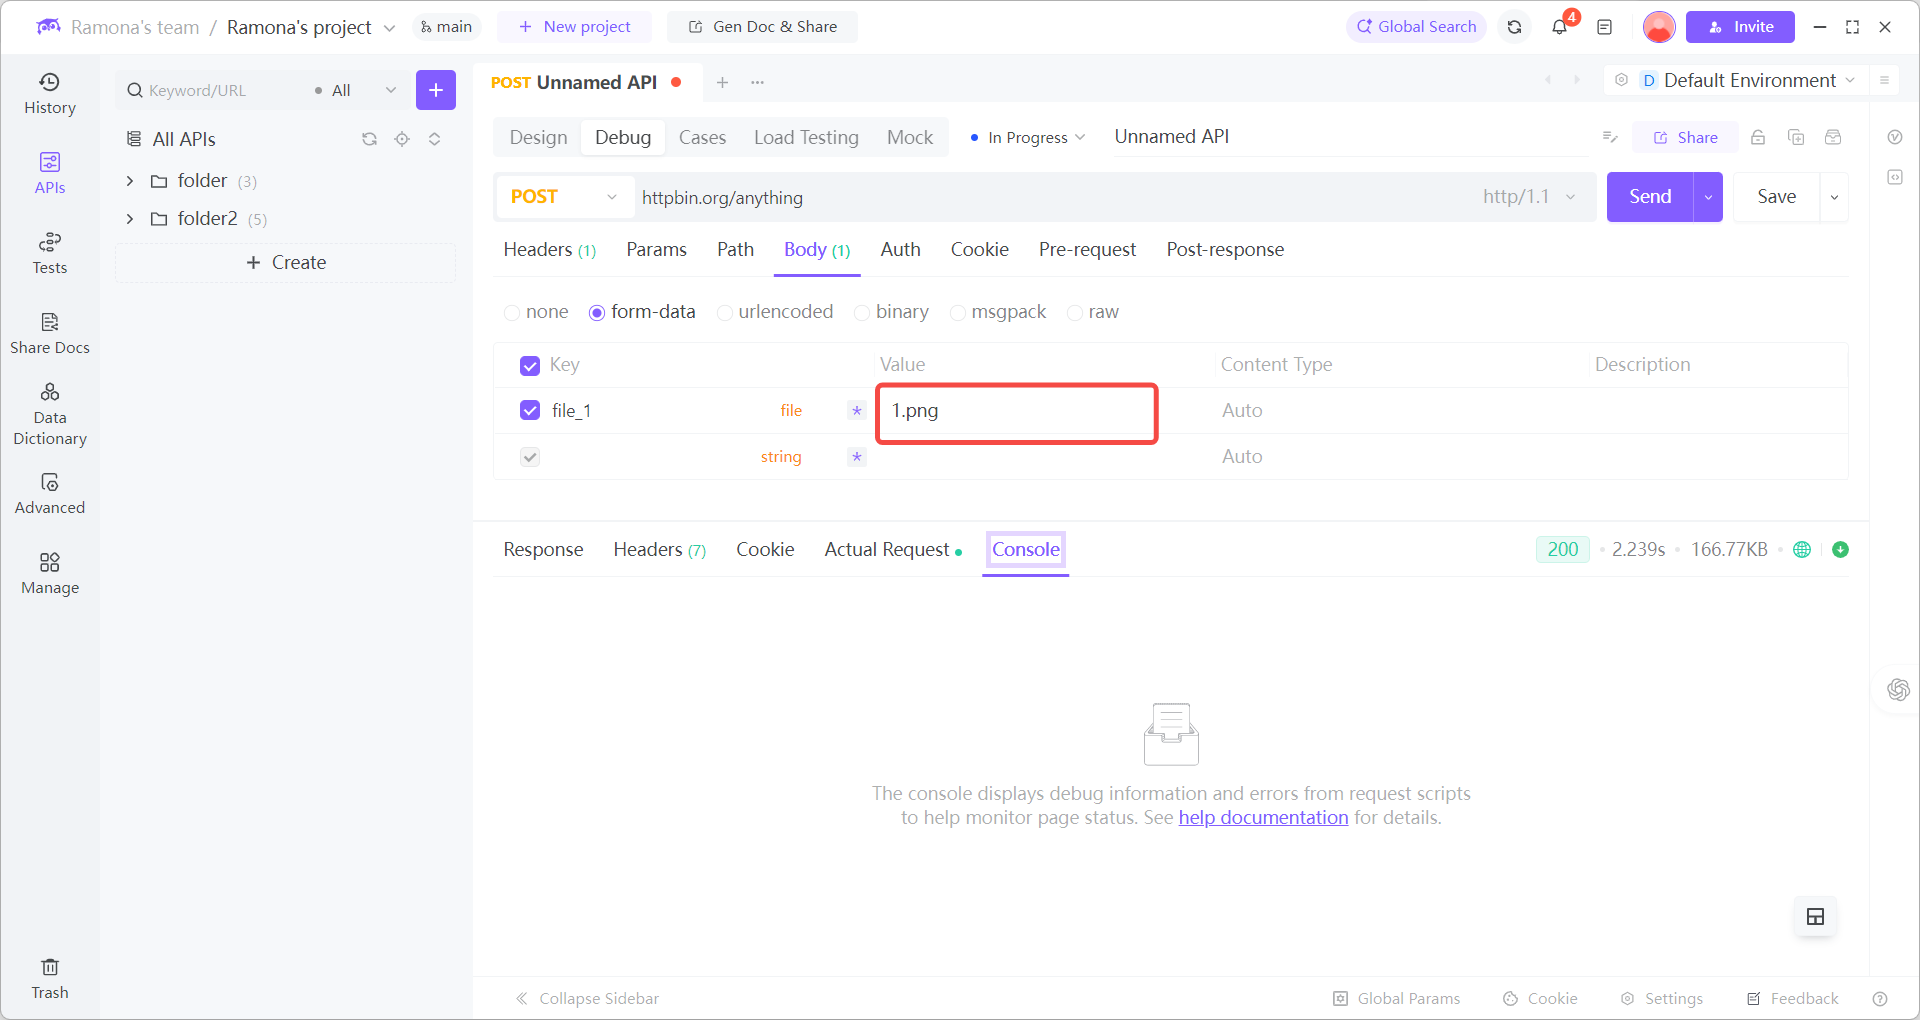
- Fill in fields as needed
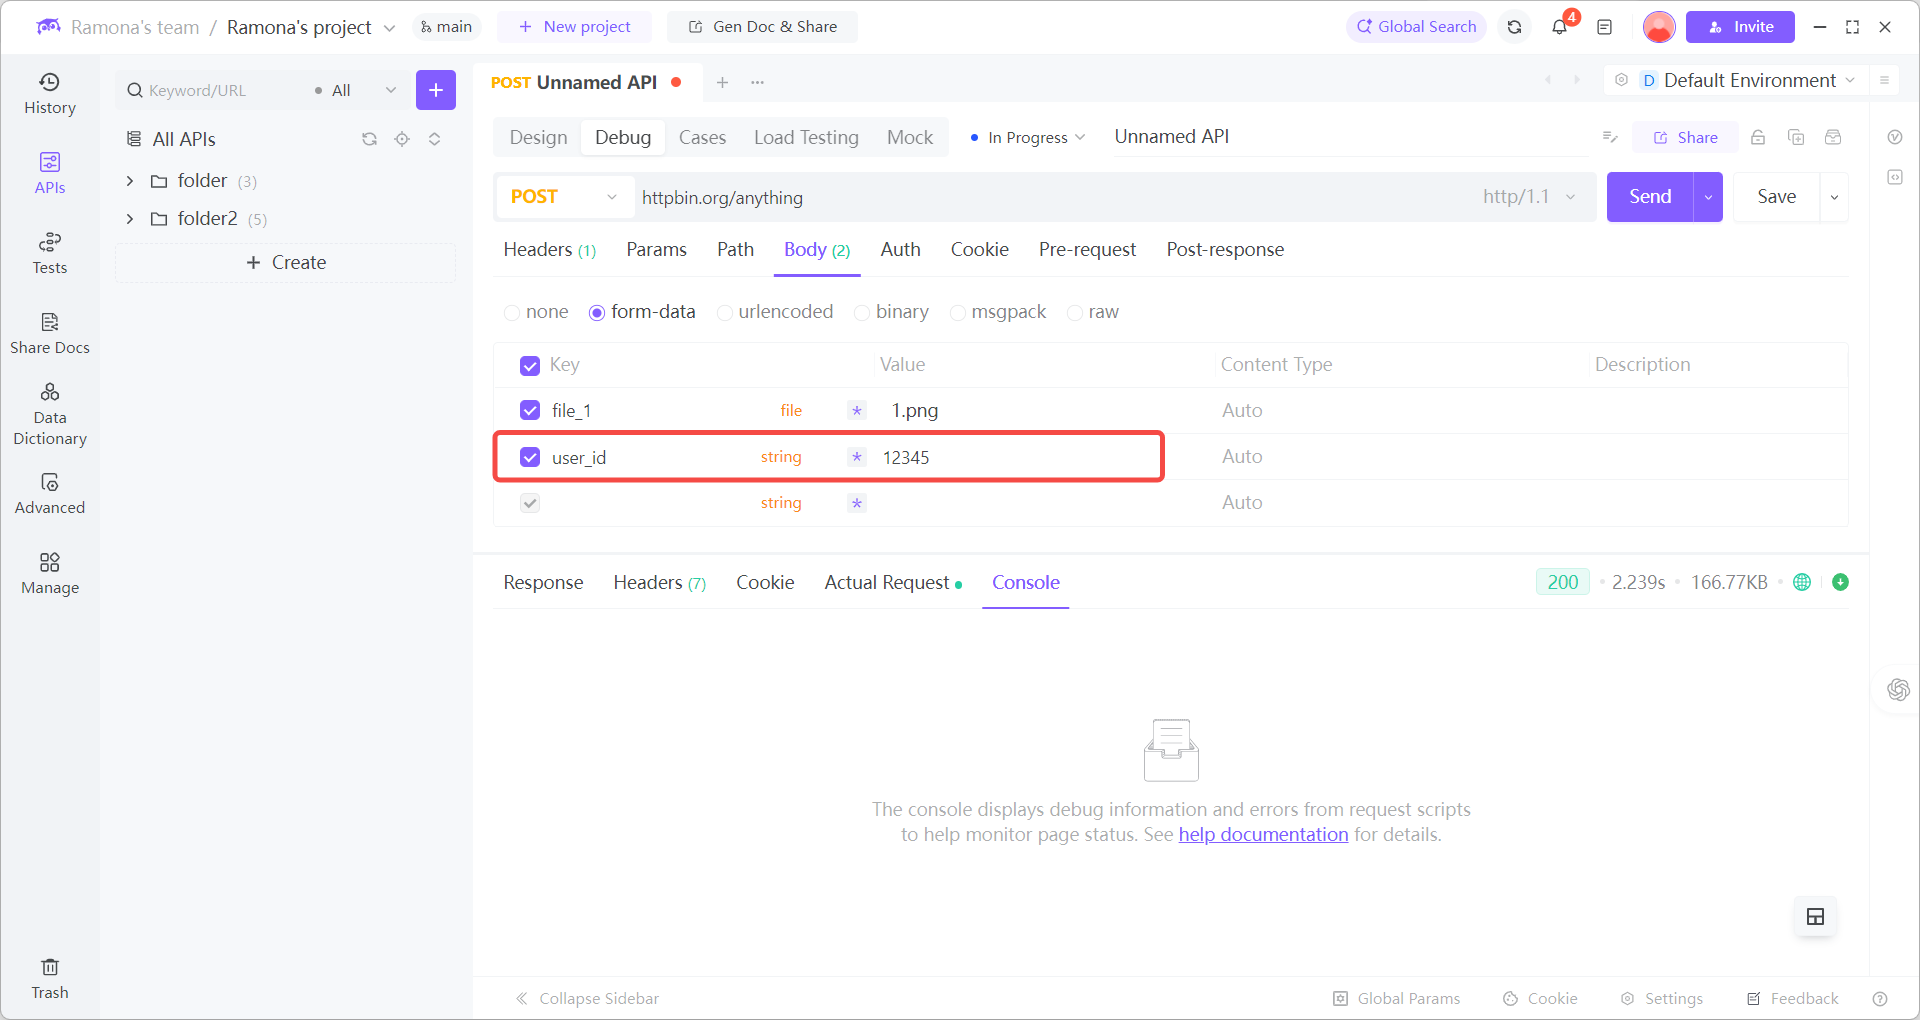
3. Send & Inspect
- Hit Send
- Review the server response in the results panel
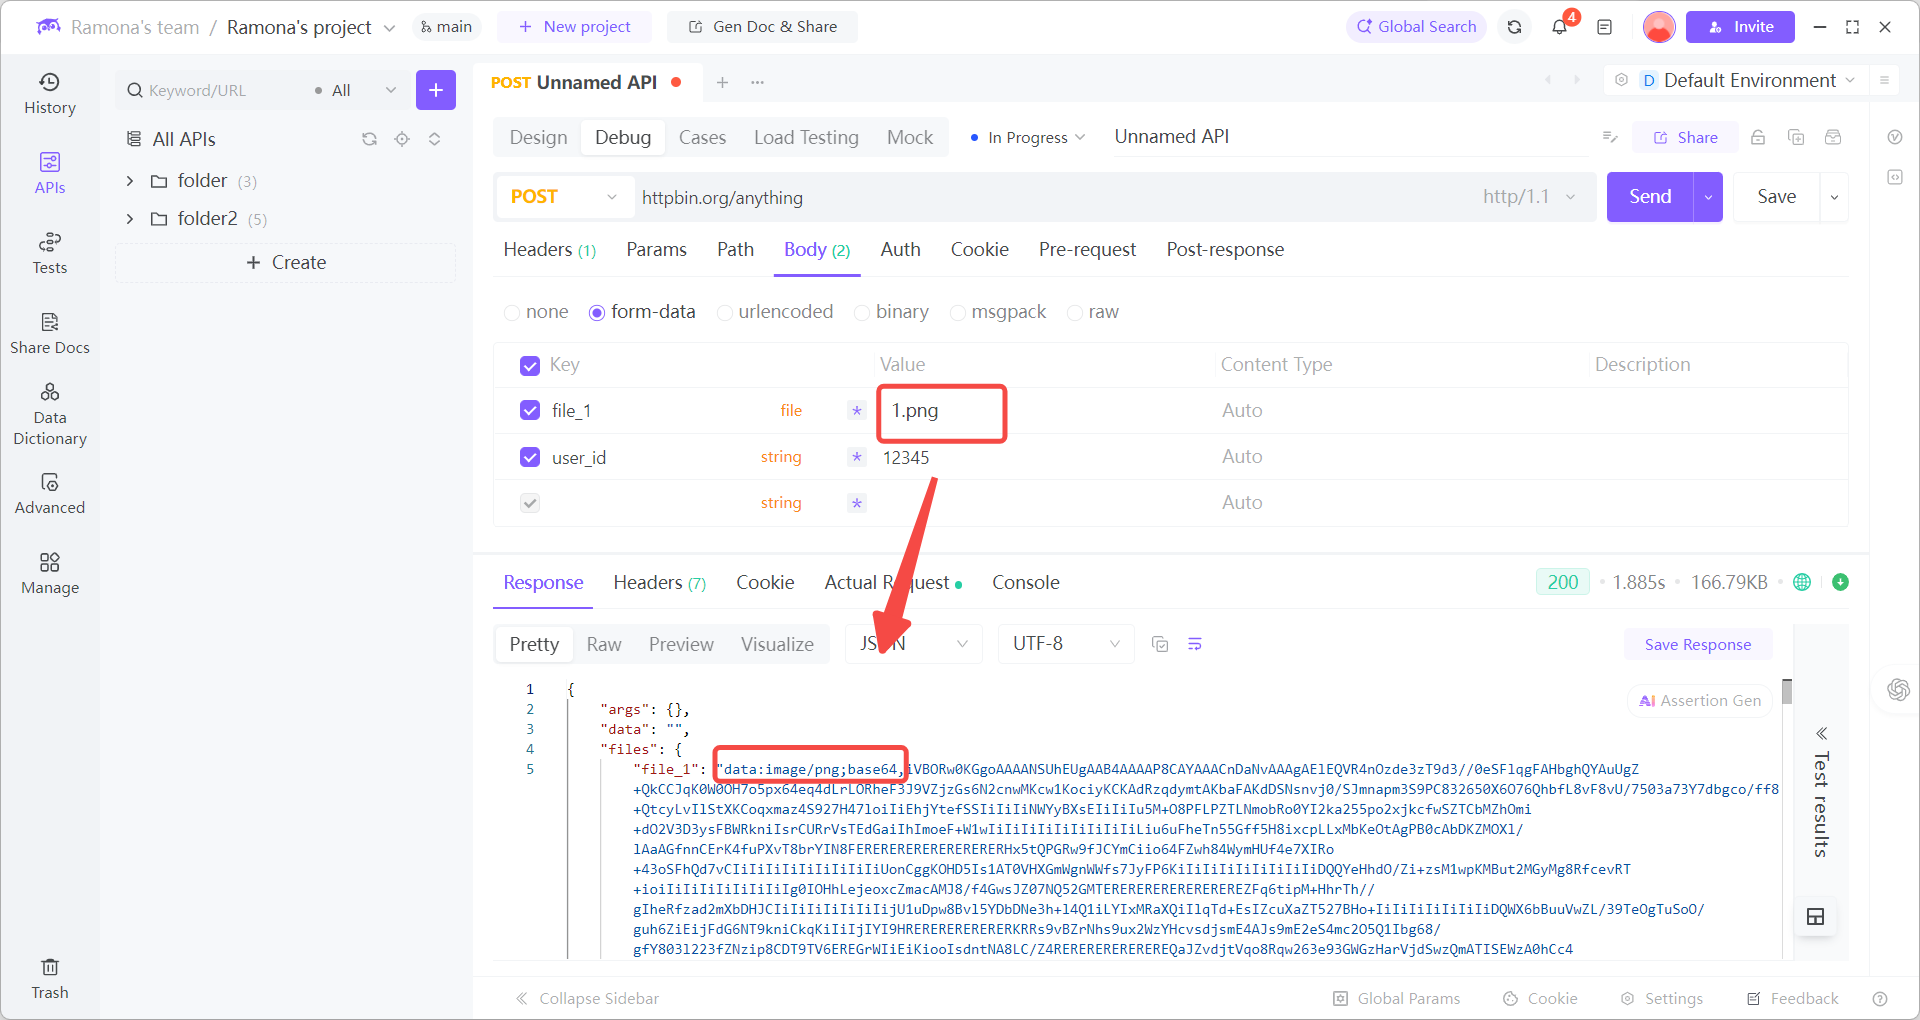
When done, your EchoAPI setup might look like this:
| Key | Value | Type |
|---|---|---|
file |
my_photo.jpg |
File |
user_id |
12345 |
Text |
API Requests to cURL
Want to quickly export your designed API as a cURL command? With just a few clicks in EchoAPI, you can instantly generate the corresponding cURL request.
Click 'Generate Code'
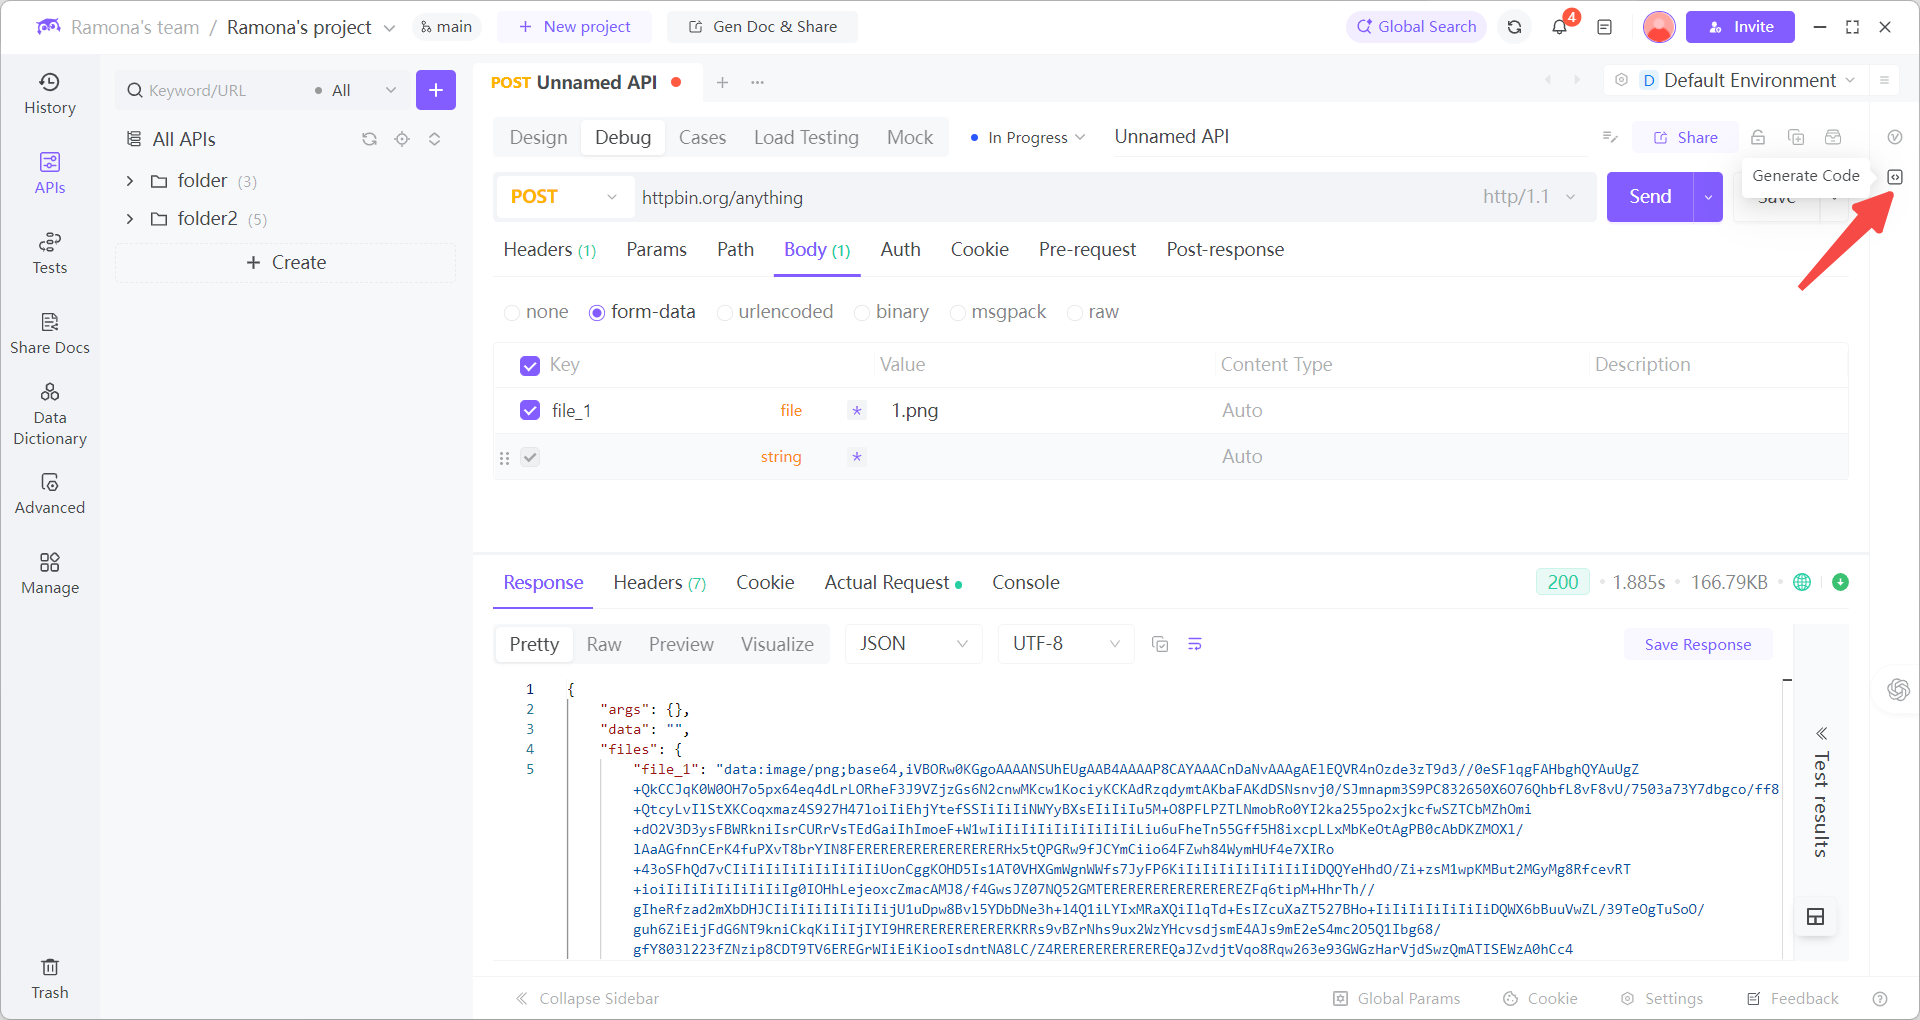
Once the code is generated, you can simply copy and use it.
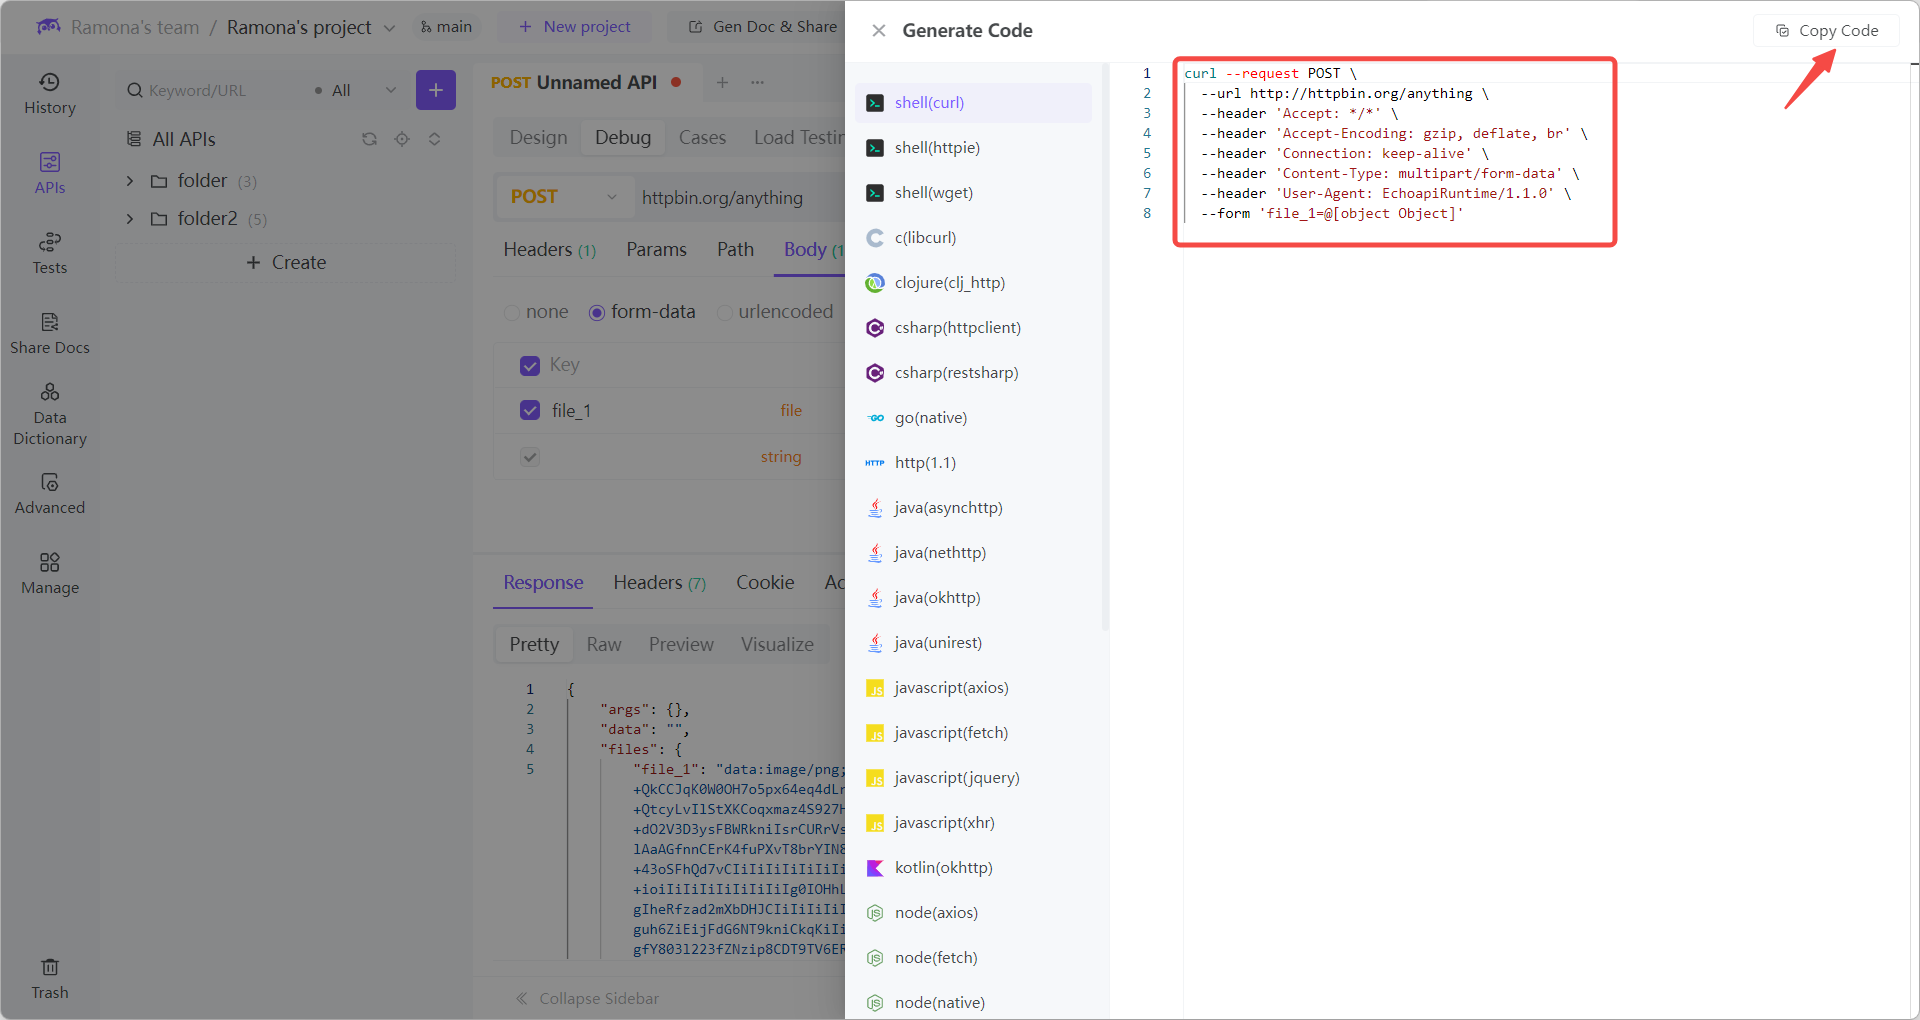
curl --request POST \
  --url http://httpbin.org/anything \
  --header 'Accept: */*' \
  --header 'Authorization: Bearer <your_token>' \
  --form 'file=@/path/to/my_photo.jpg'
When creating a new HTTP request, just paste the cURL into the URL field. EchoAPI will automatically generate the corresponding API interface.
Quick Breakdown:
-
--request POST: sets the method -
--header: adds headers (auth, etc.) -
--form: adds a multipart form-data fieldfile=@/path/to/my_photo.jpg:fileis the parameter key,@points to a local file path
How to Use File Uploads in Postman
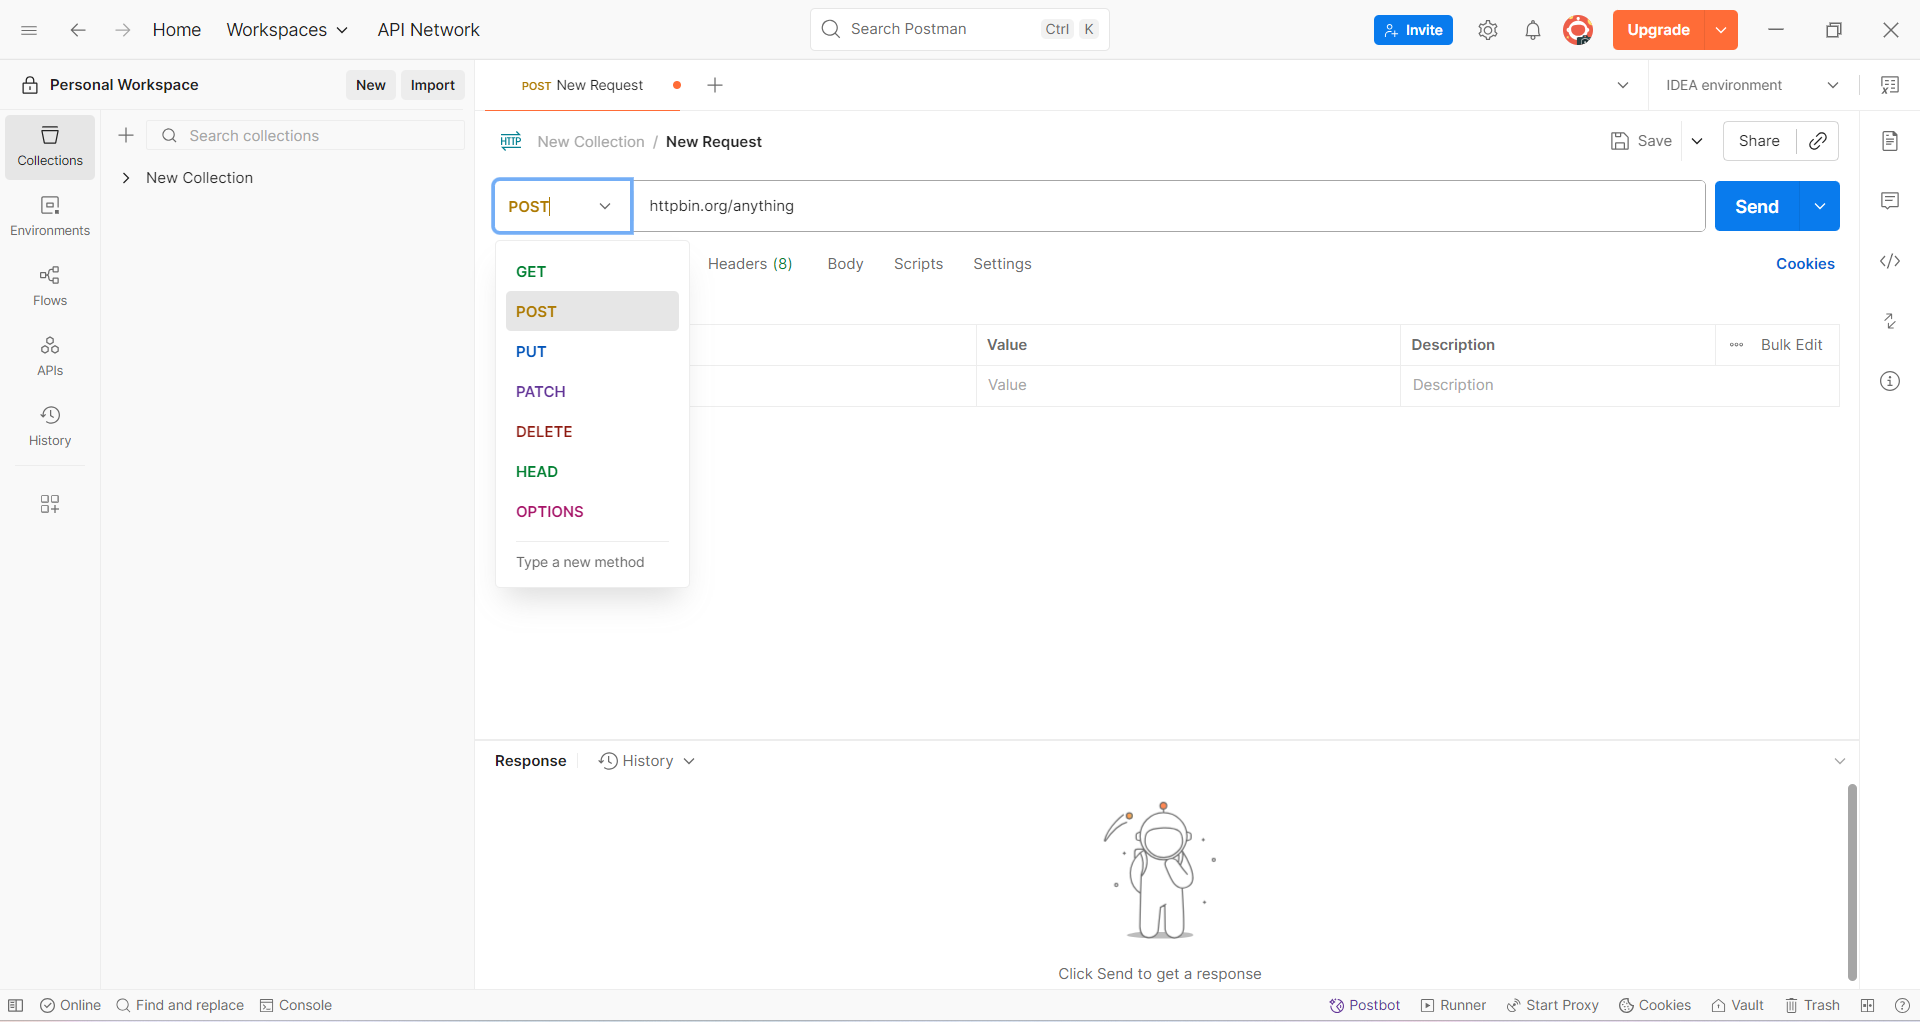
- Select
POST
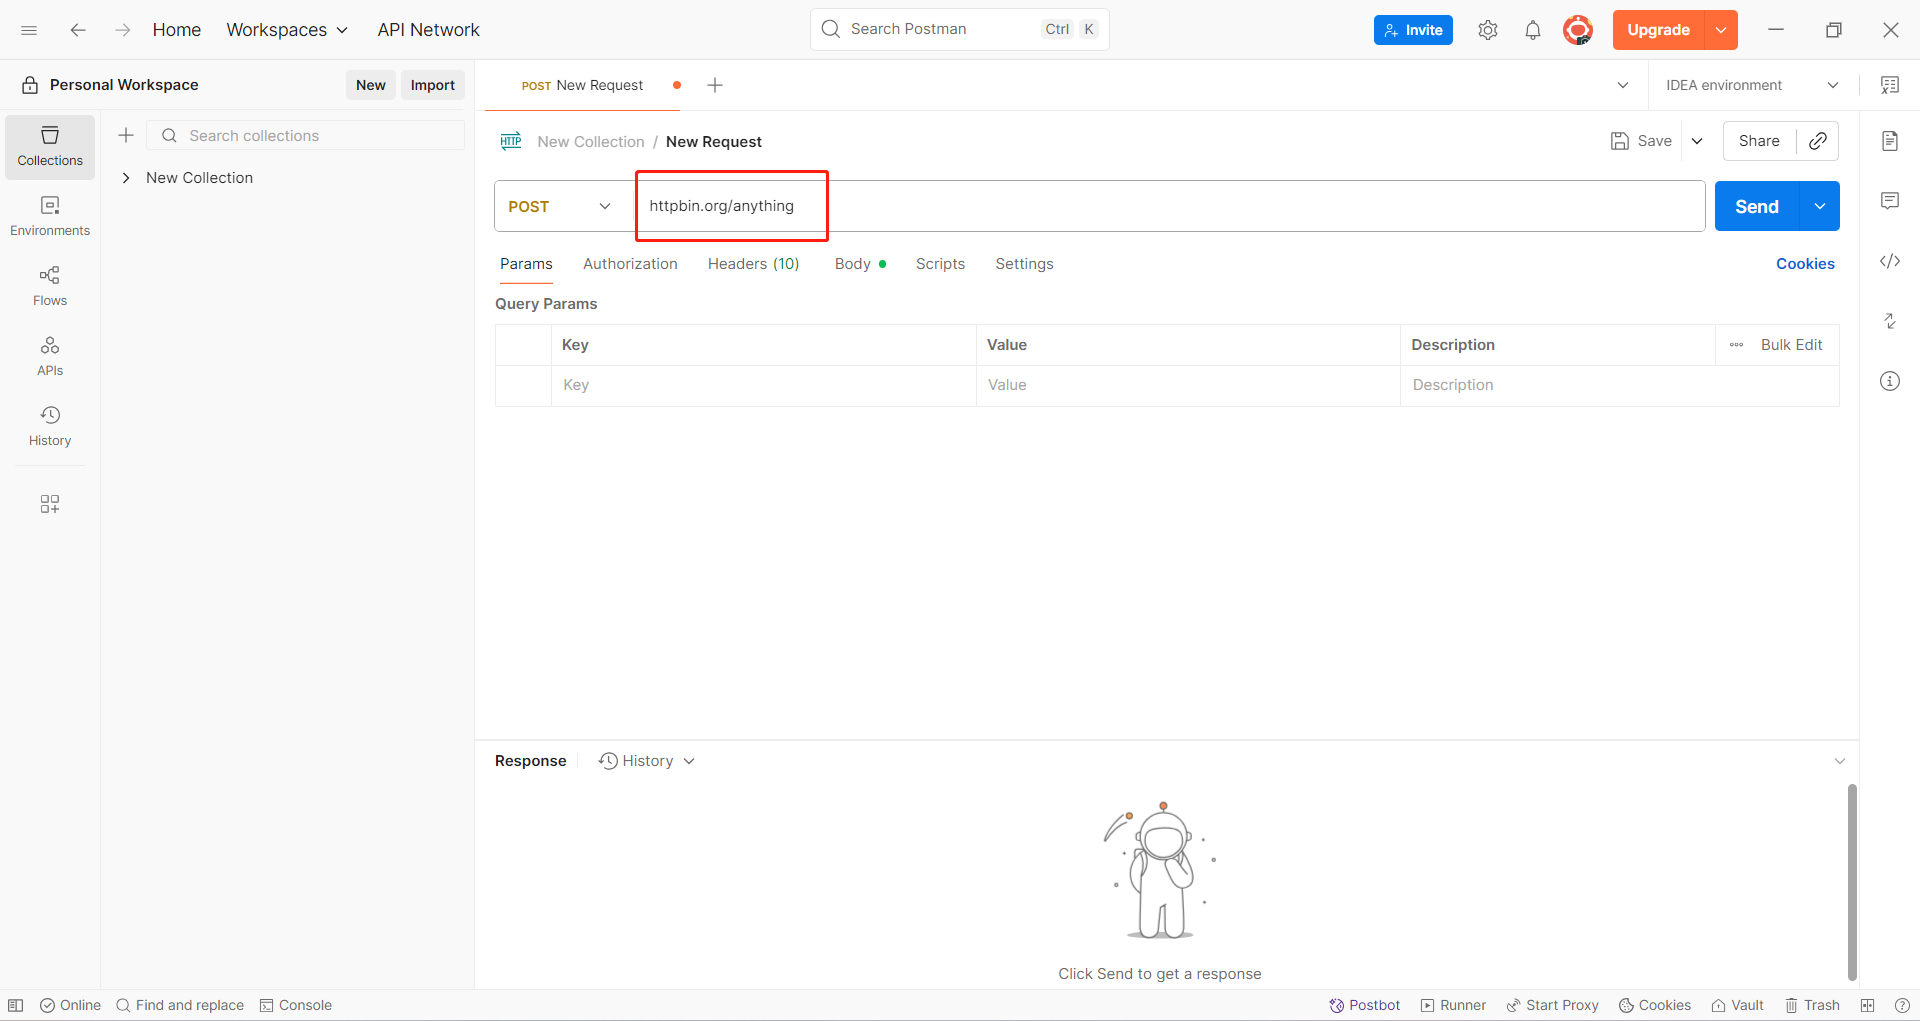
- Enter the URL
- Add auth headers if needed
- In the Body, select
data.
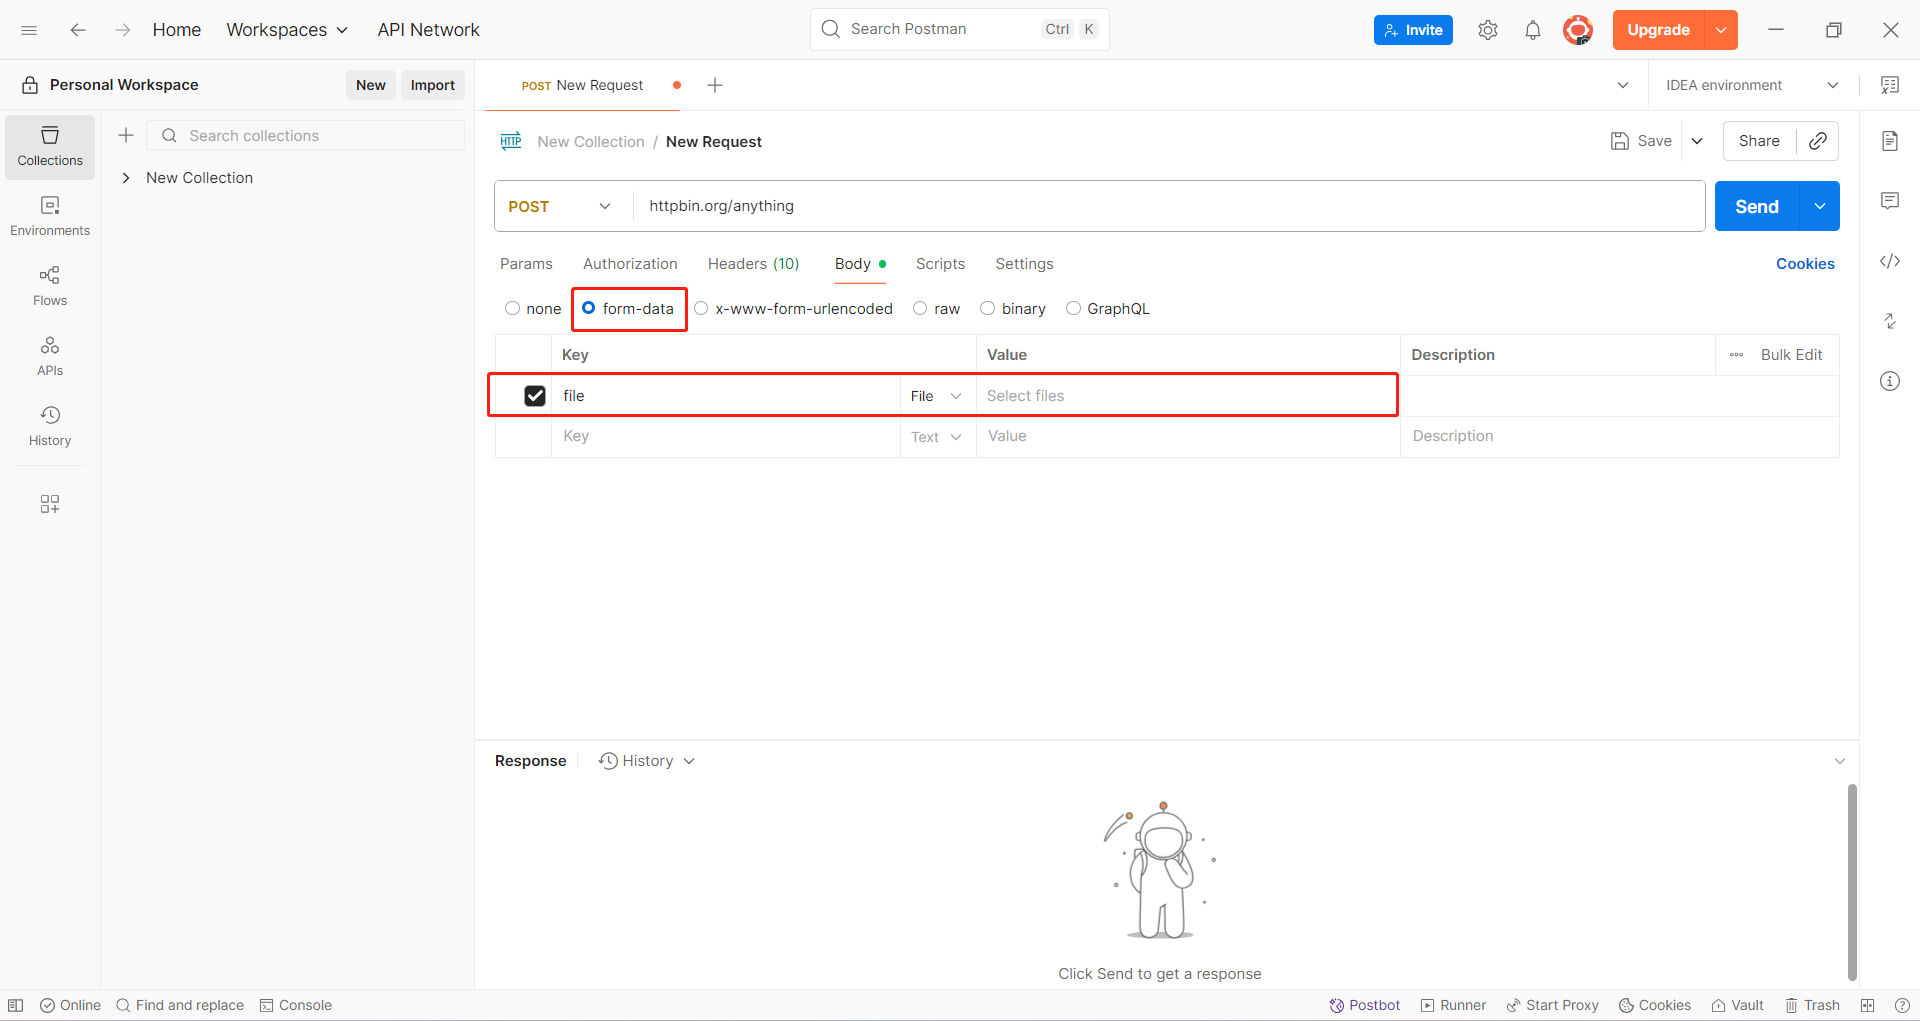
- Add fields:
file(type: File → select local file)file_name(type: Text → filename)media_type(type: Text → MIME type, e.g.image/jpeg)
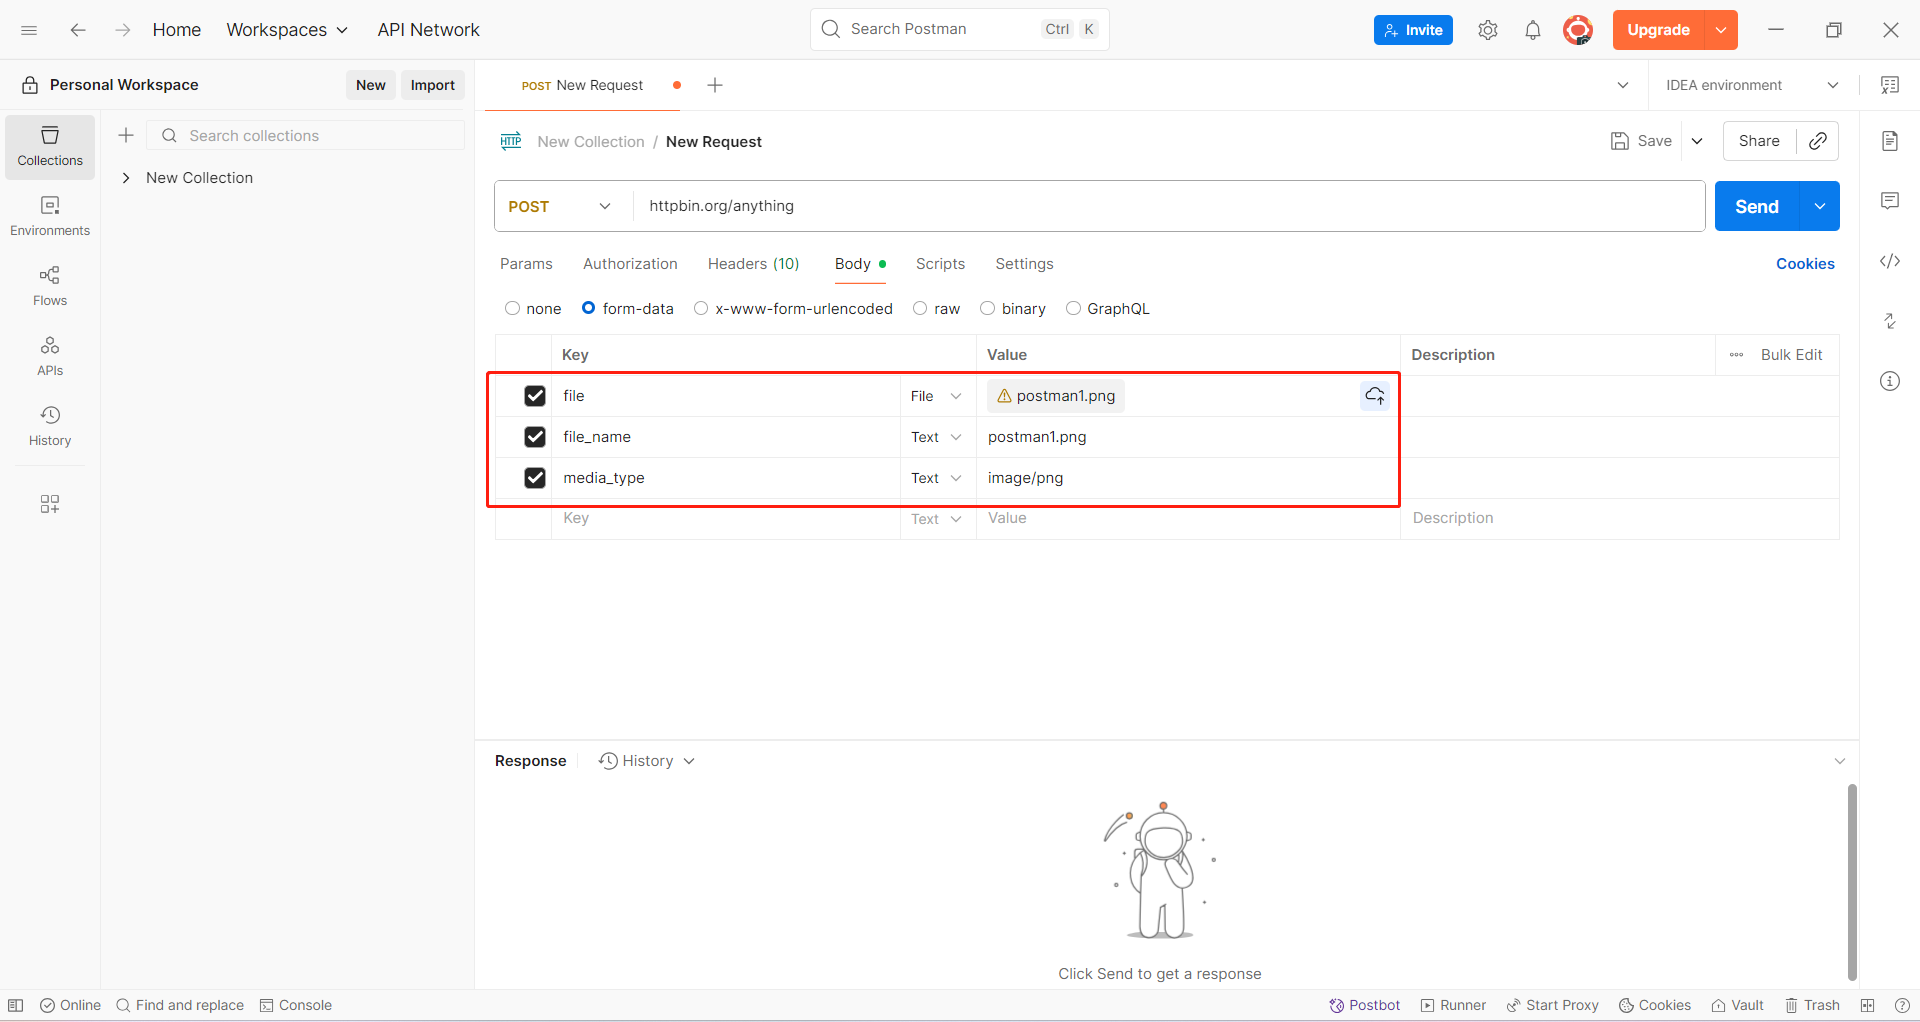
Troubleshooting File Uploads
If something goes wrong, check these first:
- API Spec – Confirm the field names and required metadata.
- Don’t touch Content-Type – Let EchoAPI handle it.
- Correct Field Types – Use File for files, Text for strings.
- Start Simple – Test with just the file, then add metadata later.
- Check the Response – Even error messages usually tell you what’s missing (
{"error": "Missing field 'file'"}).
EchoAPI’s form-data support makes file uploads painless once you get the setup right. Start small, add complexity step by step, and you’ll be testing file uploads like a pro in no time.


 EchoAPI for VS Code

 EchoAPI for IntelliJ IDEA

 EchoAPl-Interceptor

 EchoAPl CLI
 EchoAPI Client
 API Design
 API Debug
 API Documentation
 Mock Server


