How to Build an API: Step-by-Step from Idea to Deployment
Building a secure, scalable API feels like assembling IKEA furniture blindfolded. EchoAPI cuts the chaos—design, test, deploy, and manage your entire API lifecycle in one platform.
APIs are the invisible glue of modern tech. They let apps talk to each other, power your favorite services, and keep the digital world ticking.
But let’s be honest — building a secure, scalable API from scratch can feel like trying to assemble IKEA furniture without the manual. Where do you even start?
This guide will walk you through the entire API development lifecycle — no fluff, no unnecessary jargon. We’ll go from idea → design → code → deployment, all using a practical real-world example. By the end, you’ll see exactly how a production-ready API comes together.

Example Project: The Book Review API
We’ll build a simple but realistic Book Review API where users can:
- Sign up and log in
- Search for books
- Post and read reviews
Think of it as Goodreads Lite, but with a clean API design and developer-friendly architecture.
1. Requirements & Big-Picture Design
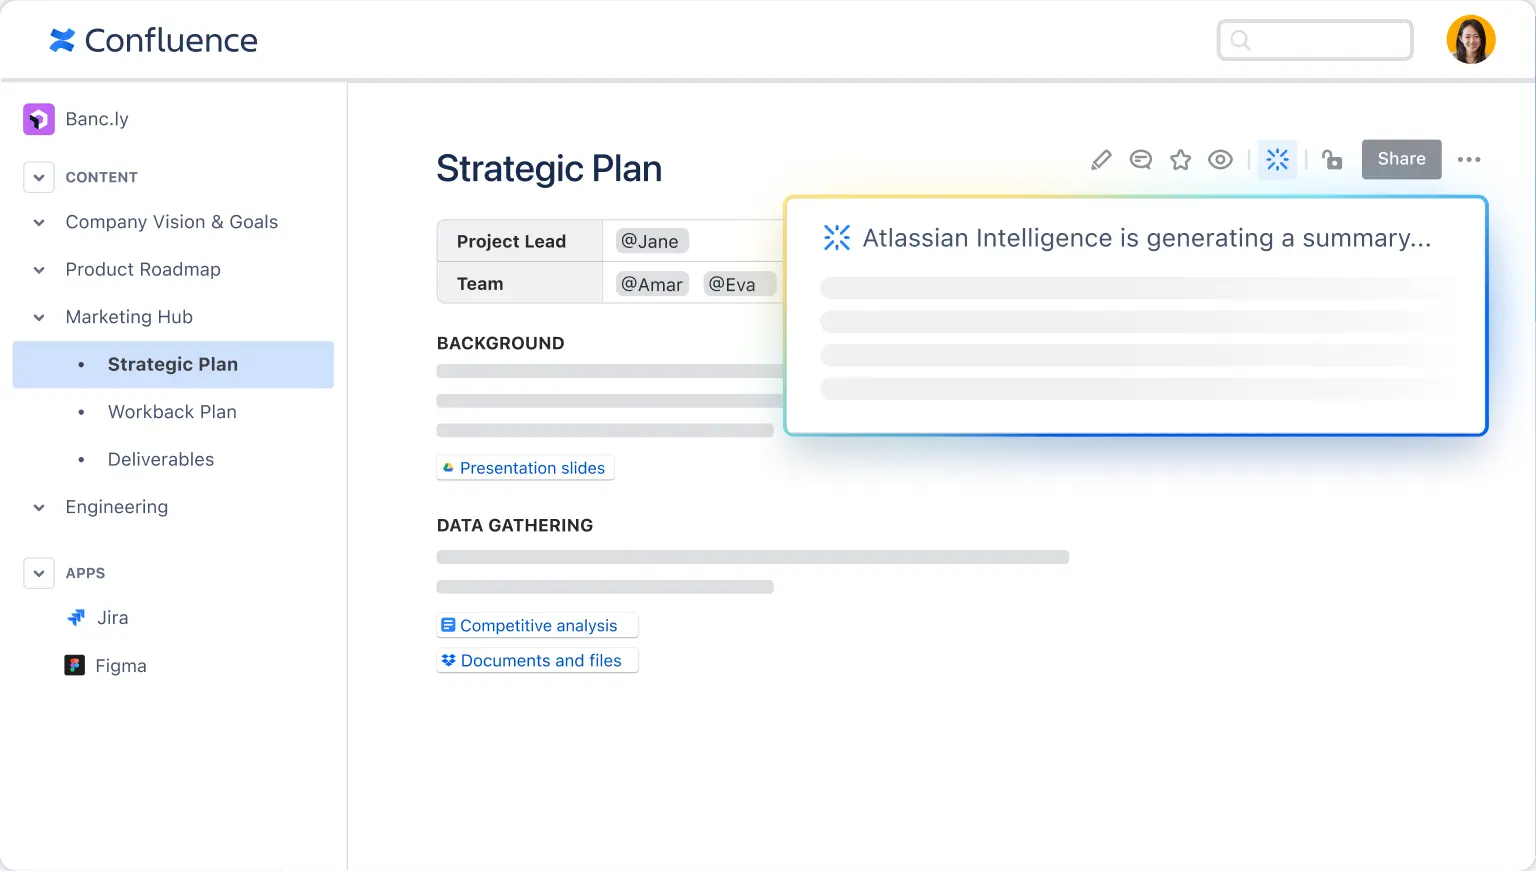
Before touching a single line of code, we define what the system needs to do and how we’ll build it.
Core Requirements:
- Users can create accounts and log in
- Users can search for books by title
- Users can post and view reviews
- System must scale to thousands of users without choking
Tech Stack Choices (and Why):
- Framework: Spring Boot — quick, opinionated REST API development
- Database: PostgreSQL — rock-solid relational database
- Auth: JWT — stateless, secure token-based login
- Architecture: Layered — Controllers (HTTP), Services (business logic), Repositories (data)
- Scalability: Stateless endpoints so we can scale horizontally later
💡 Example Flow: A review POST request → REST Controller → Service validation → Database save → Success response.
Tools for This Stage:
- Planning & brainstorming in Google Docs or Confluence
- Whiteboards, sticky notes, and caffeine
2. Database Design
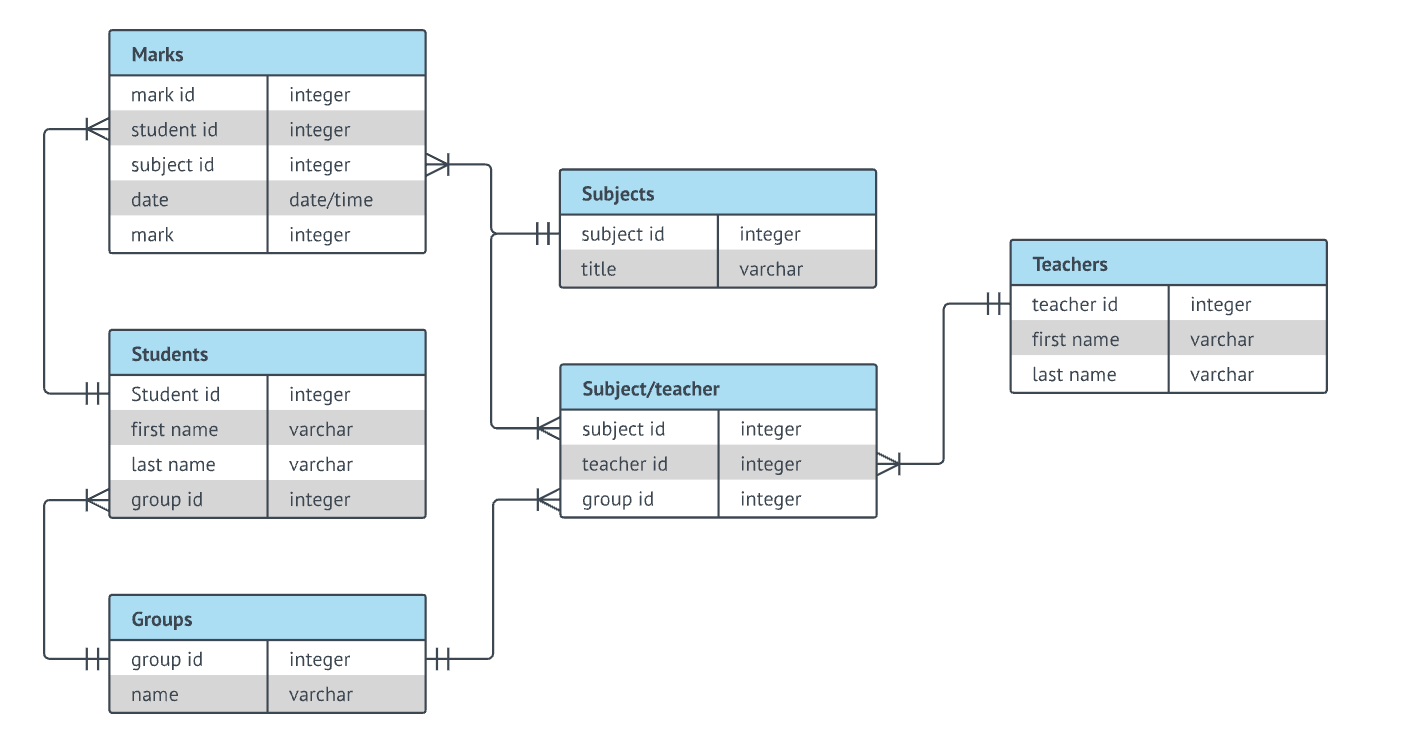
Here’s where your ideas turn into a real data model.
Our Entities:
- Users:
id,username,email,password_hash - Books:
id,title,author,isbn - Reviews:
id,book_id,user_id,rating,comment
Relationships:
- One User → many Reviews
- One Book → many Reviews
- Reviews link Users and Books together
Tools:
- Lucidchart / Draw.io for ERDs
- IntelliJ IDEA’s Database tool for schema previews
3. API Design
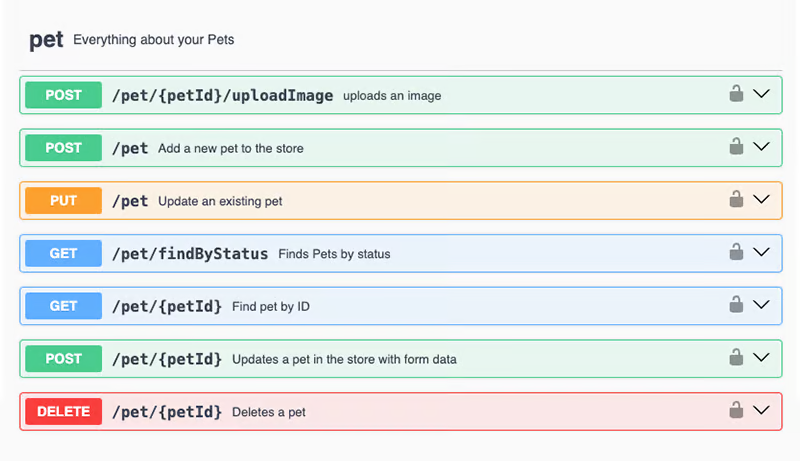
Now we decide what the API looks like from the outside — endpoints, request formats, responses, and error handling.
Example Endpoints:
POST /users/register— create accountPOST /users/login— get JWTGET /books?search=title— find booksPOST /reviews— post review (JWT required)GET /reviews/{bookId}— list reviews for a book
Tools:
- Swagger / OpenAPI for interactive API docs
- Sample JSON payloads for clarity
4. Coding the API
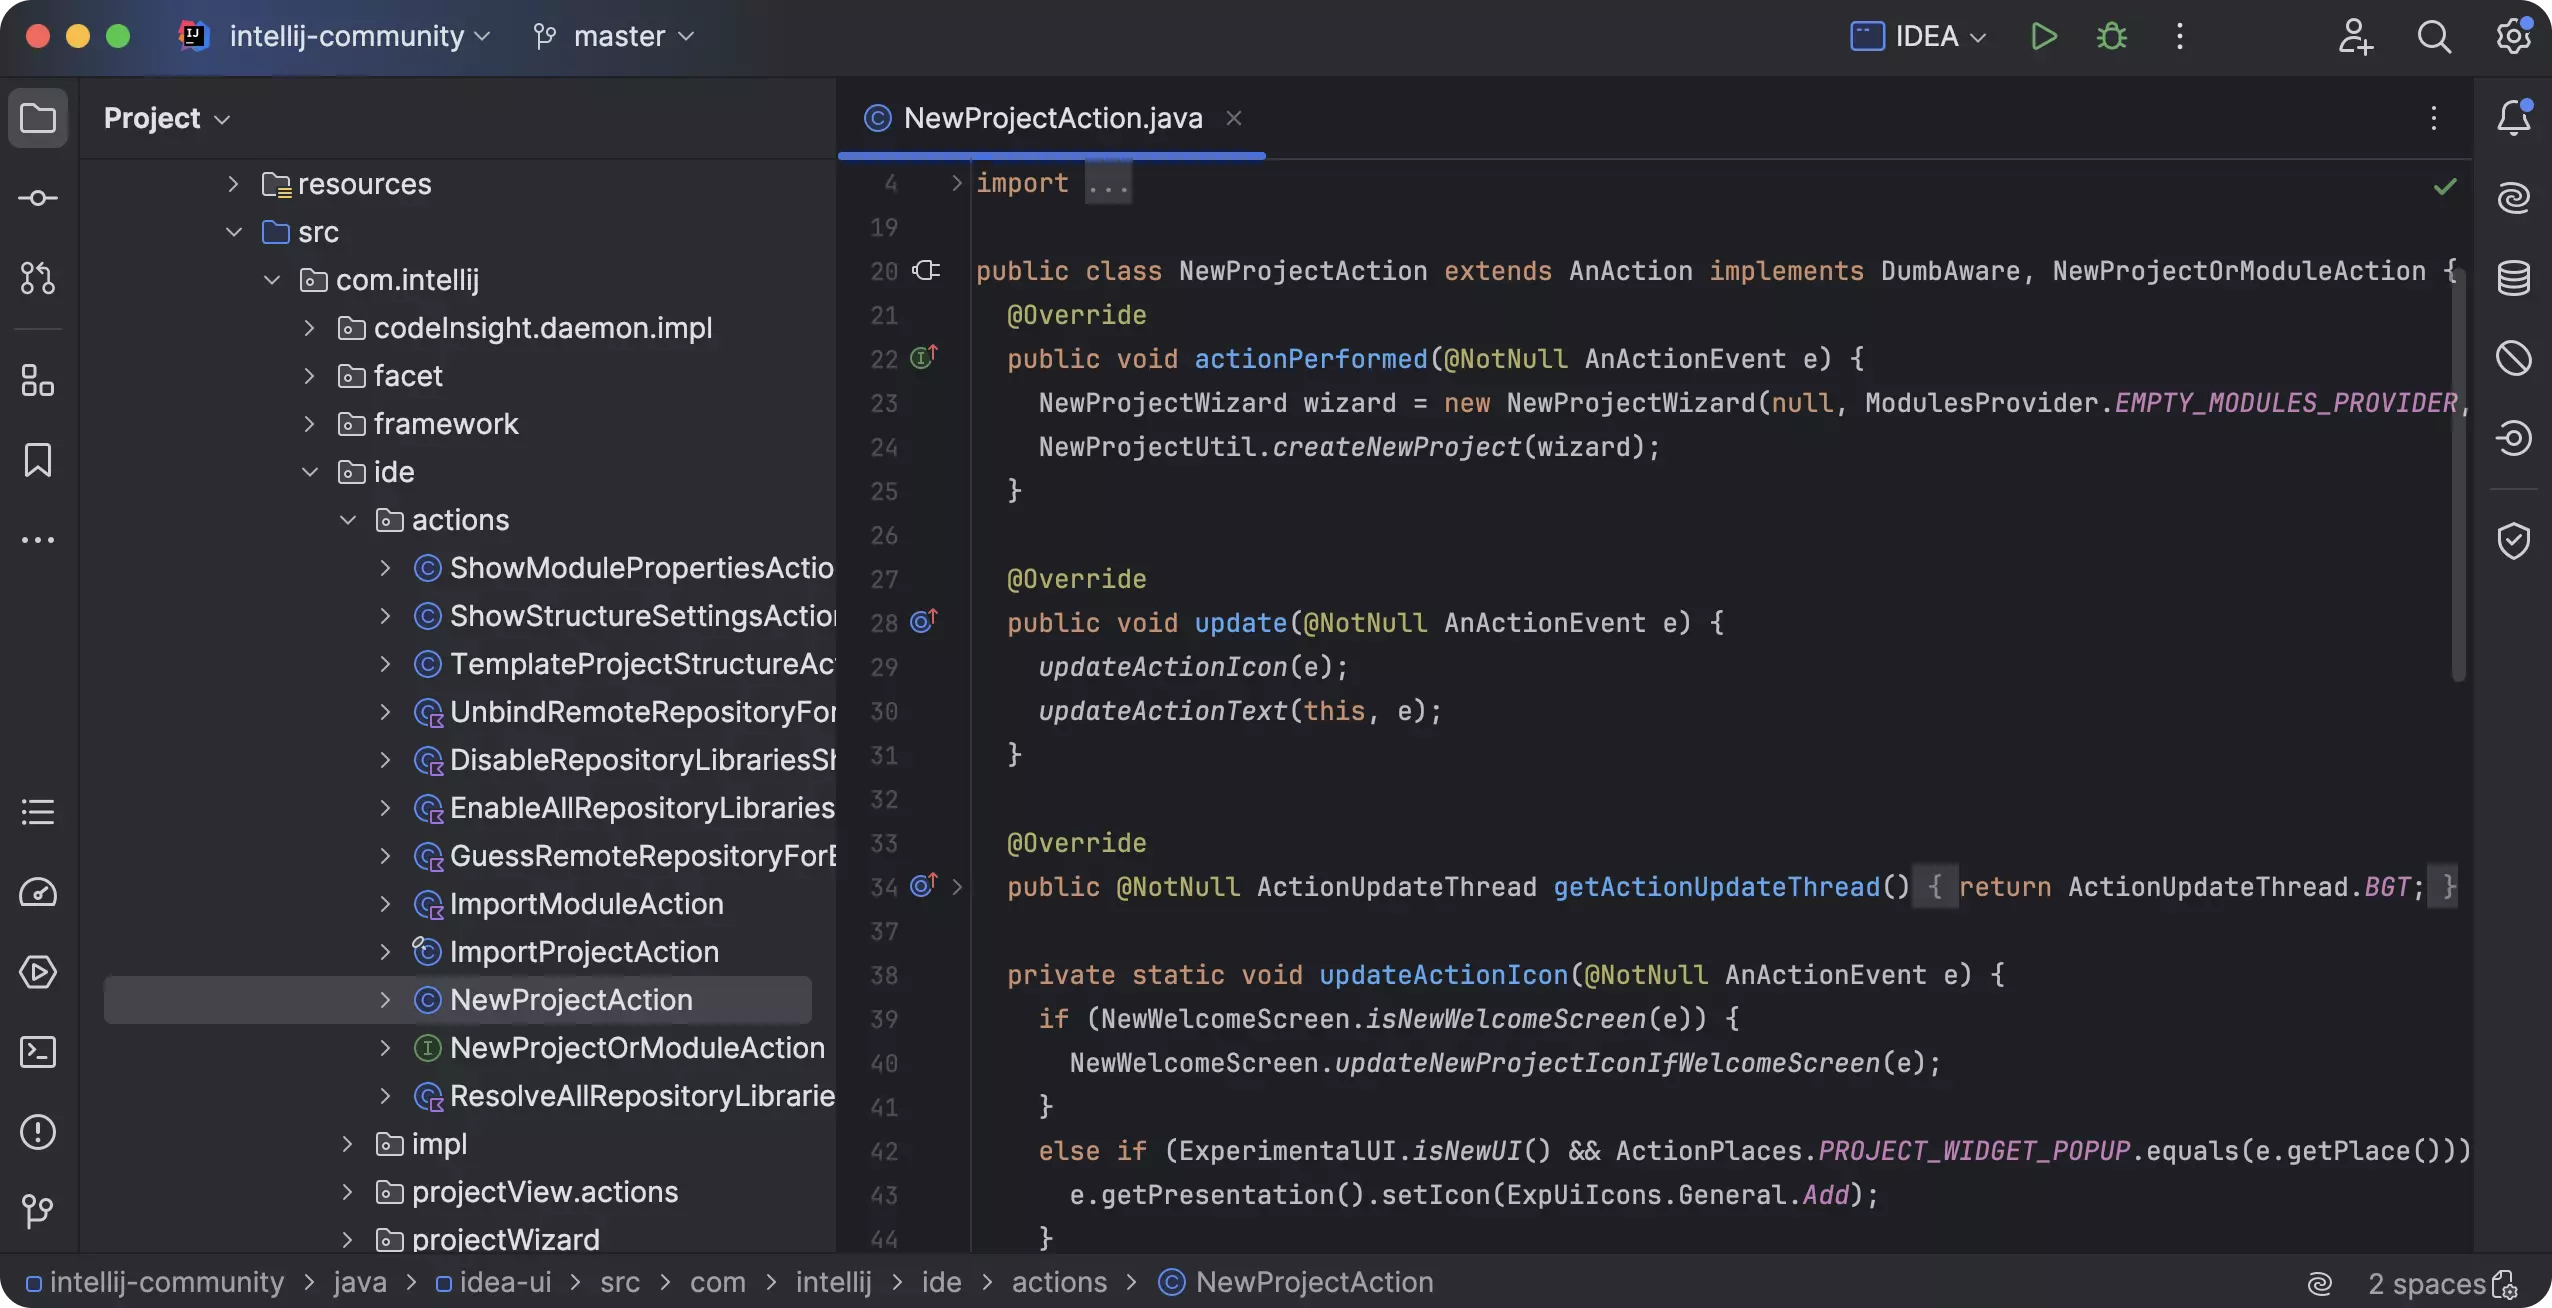
With the blueprint ready, we jump into implementation.
Typical Workflow:
- Generate a Spring Boot project (Maven or Gradle)
- Add dependencies: Spring Web, Data JPA, Security, PostgreSQL driver
- Create entity classes (
User,Book,Review) - Build repositories for DB access
- Write services for core logic
- Add controllers for request handling
Example Controller:
@RestController
@RequestMapping("/books")
public class BookController {

    @GetMapping
    public List<Book> searchBooks(@RequestParam String search) {
        return bookService.findByTitleContaining(search);
    }
}
Tools:
- IntelliJ IDEA Ultimate (killer Spring Boot support)
5. Testing the API (Manual First)
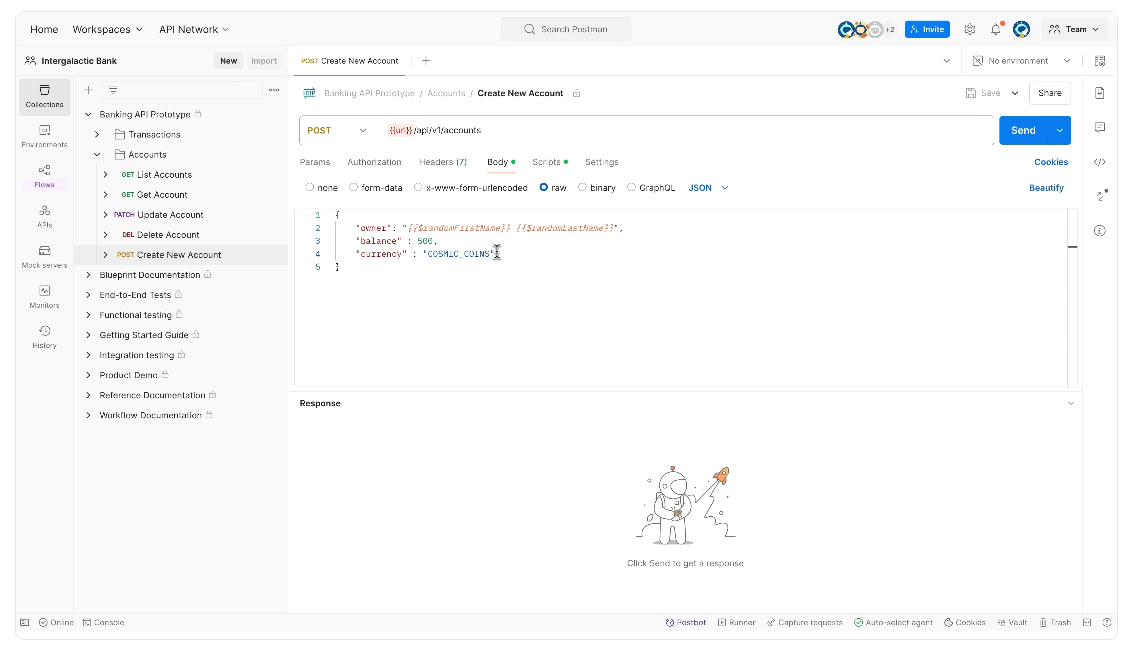
Before automation, I like to manually poke the API to make sure it behaves.
Process:
- Run app in IntelliJ
- Send requests via Postman or IntelliJ’s HTTP Client
- Check responses, validate errors, tweak code
Example Test Cases:
- Register → confirm success
- Log in → check JWT is returned
- Search books → verify results
- Post review → check DB for entry
6. Deploying Your API
Once your API is humming locally, it’s time to deploy it for the world. Packaging it as a JAR is just the start — now we’ll talk about the tools and environments you can use.
Packaging the JAR:
mvn clean package
You’ll get:
target/book-review-api-1.0.0.jar
Run anywhere with:
java -jar target/book-review-api-1.0.0.jar
Deployment Options & Tools:
- Cloud Providers
- AWS EC2 / Lightsail: Full server control; SSH in, run your JAR.
- Heroku: Push your code via Git; Heroku handles JVM and deployment.
- Google Cloud / Azure: Similar to AWS; great if you already use their ecosystem.
- Containerization
- Process Managers (for long-running apps)
- systemd (Linux) or PM2 (Node-compatible environments) keep your API alive and restart it on failure.
- Reverse Proxies / Load Balancers
- Nginx or Traefik: Route HTTP traffic to your API, enable HTTPS, and scale easily.
Run anywhere:
docker build -t book-review-api .
docker run -p 8080:8080 book-review-api
Docker: Package your API with all dependencies, making it portable and consistent. Example Dockerfile:
FROM openjdk:17-jdk-alpine
COPY target/book-review-api-1.0.0.jar app.jar
ENTRYPOINT ["java","-jar","/app.jar"]
Now your API isn’t just running locally — it’s ready for production, scalable, and maintainable with industry-standard tools.
✅ Quick Recap
- Plan & Design — Understand the needs, pick your stack
- Database Design — Build an ERD
- API Design — Define endpoints & payloads
- Code It — Implement with Spring Boot
- Test It — Verify with Postman
- Deploy — Ship your JAR file
Simplifying the Process with EchoAPI: One Tool to Rule Them All
Traditionally, building an API meant juggling multiple tools: Google Docs or Confluence for planning, Swagger for design, Postman for testing, and a separate IDE for coding. But what if one platform could handle it all? Enter EchoAPI — a powerful, all-in-one solution that streamlines the entire API development lifecycle, from planning to deployment. Here’s how it transforms each stage:
1. Requirement Analysis & Solution Design
Instead of hopping between Google Docs, Confluence, or whiteboards, EchoAPI lets you create rich Markdown documents directly in the platform. You can define your requirements, map out your solution, and collaborate with your team — all in one place. No more scattered notes or lost updates.
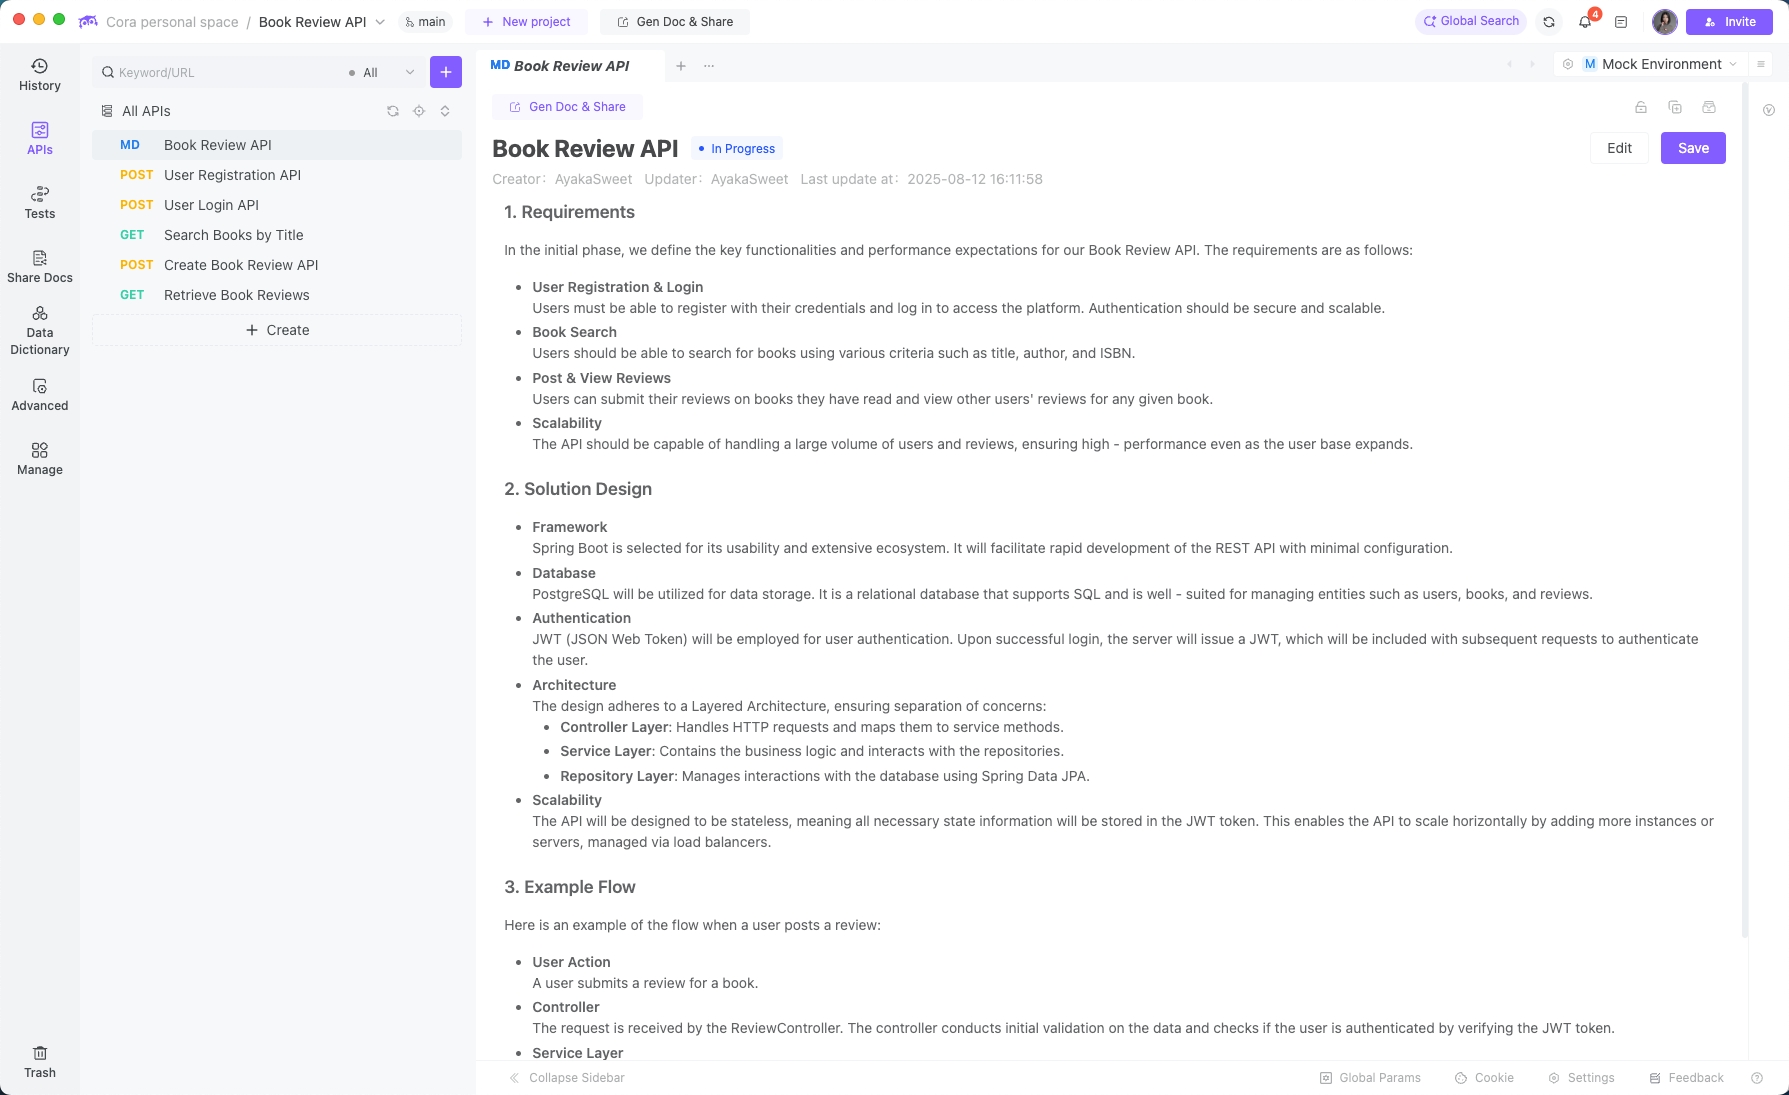
Why it’s better:
- Centralized documentation for your entire team
- Easy version tracking and collaboration
- Clear link between requirements and API design
2. API Design & Mock Generation
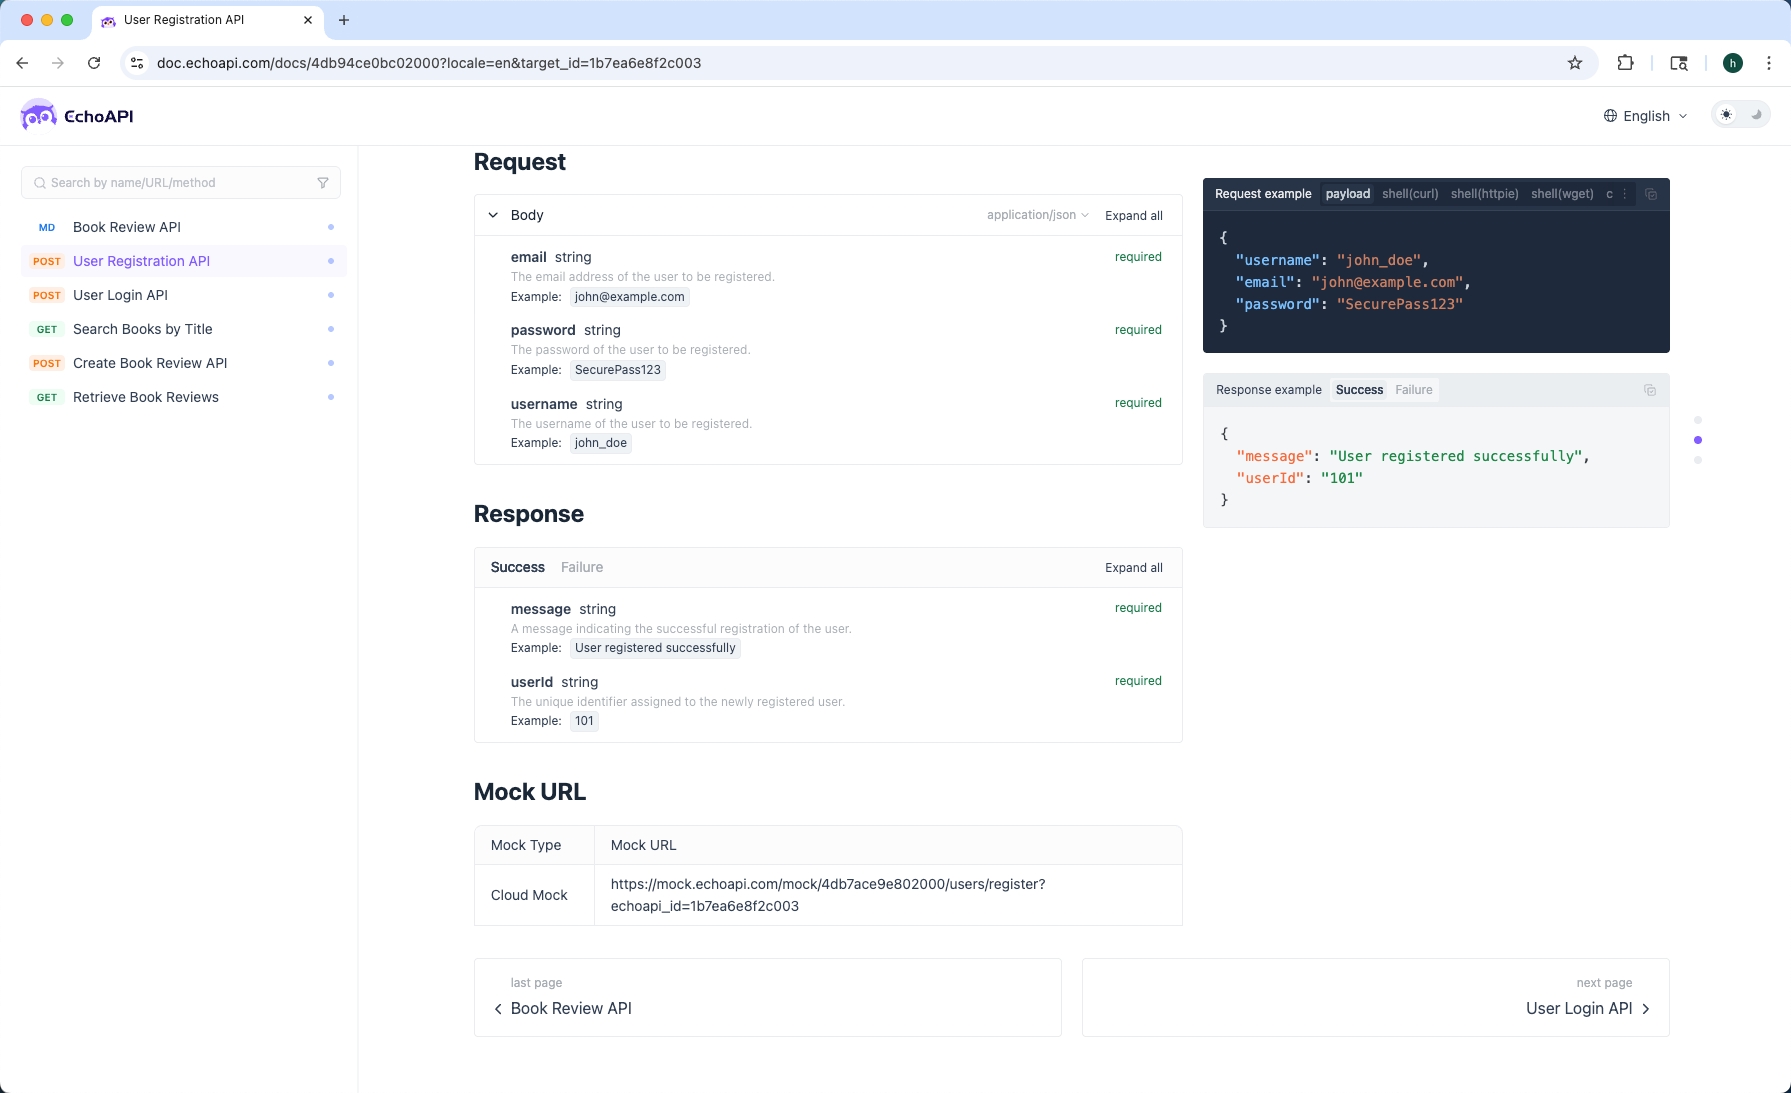
Designing endpoints has never been easier. With EchoAPI, you can define methods, parameters, response formats, and even error handling — all visually and intuitively.
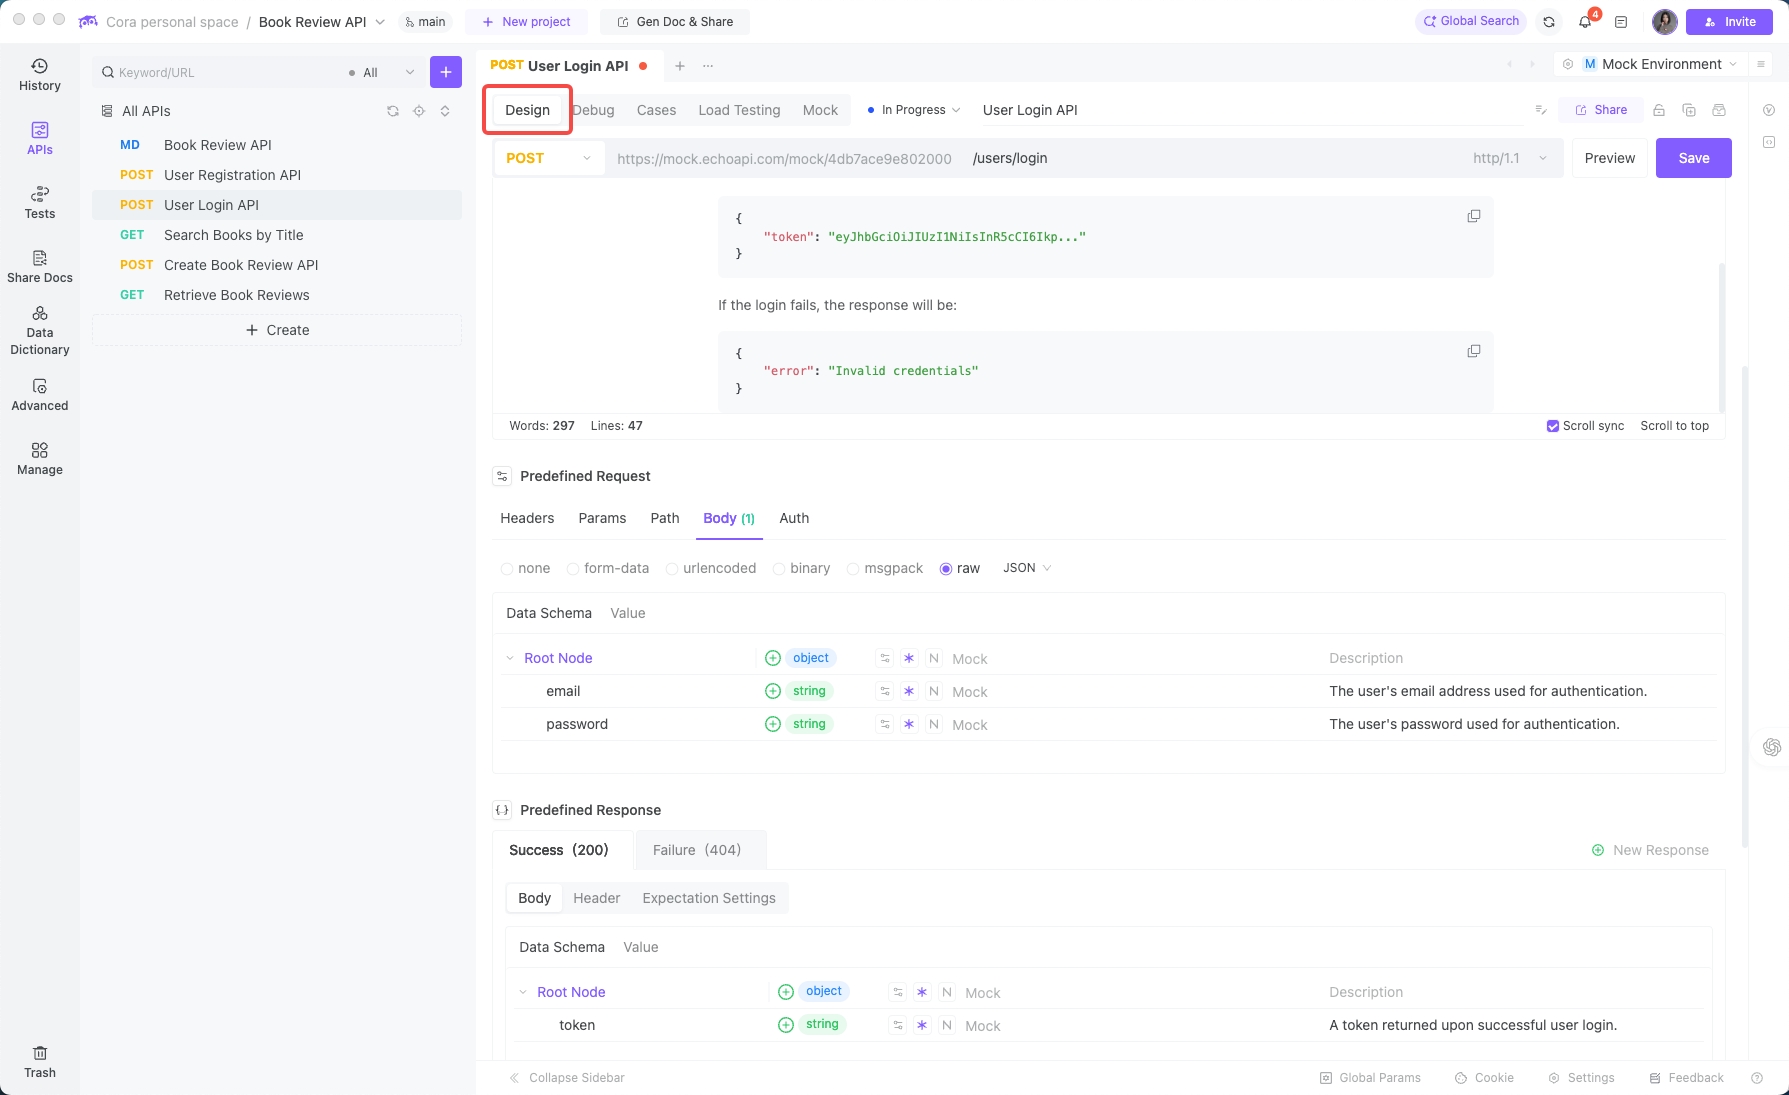
The real magic? EchoAPI automatically generates a mock API from your design. That means you can start testing your endpoints immediately, even before writing a single line of code.
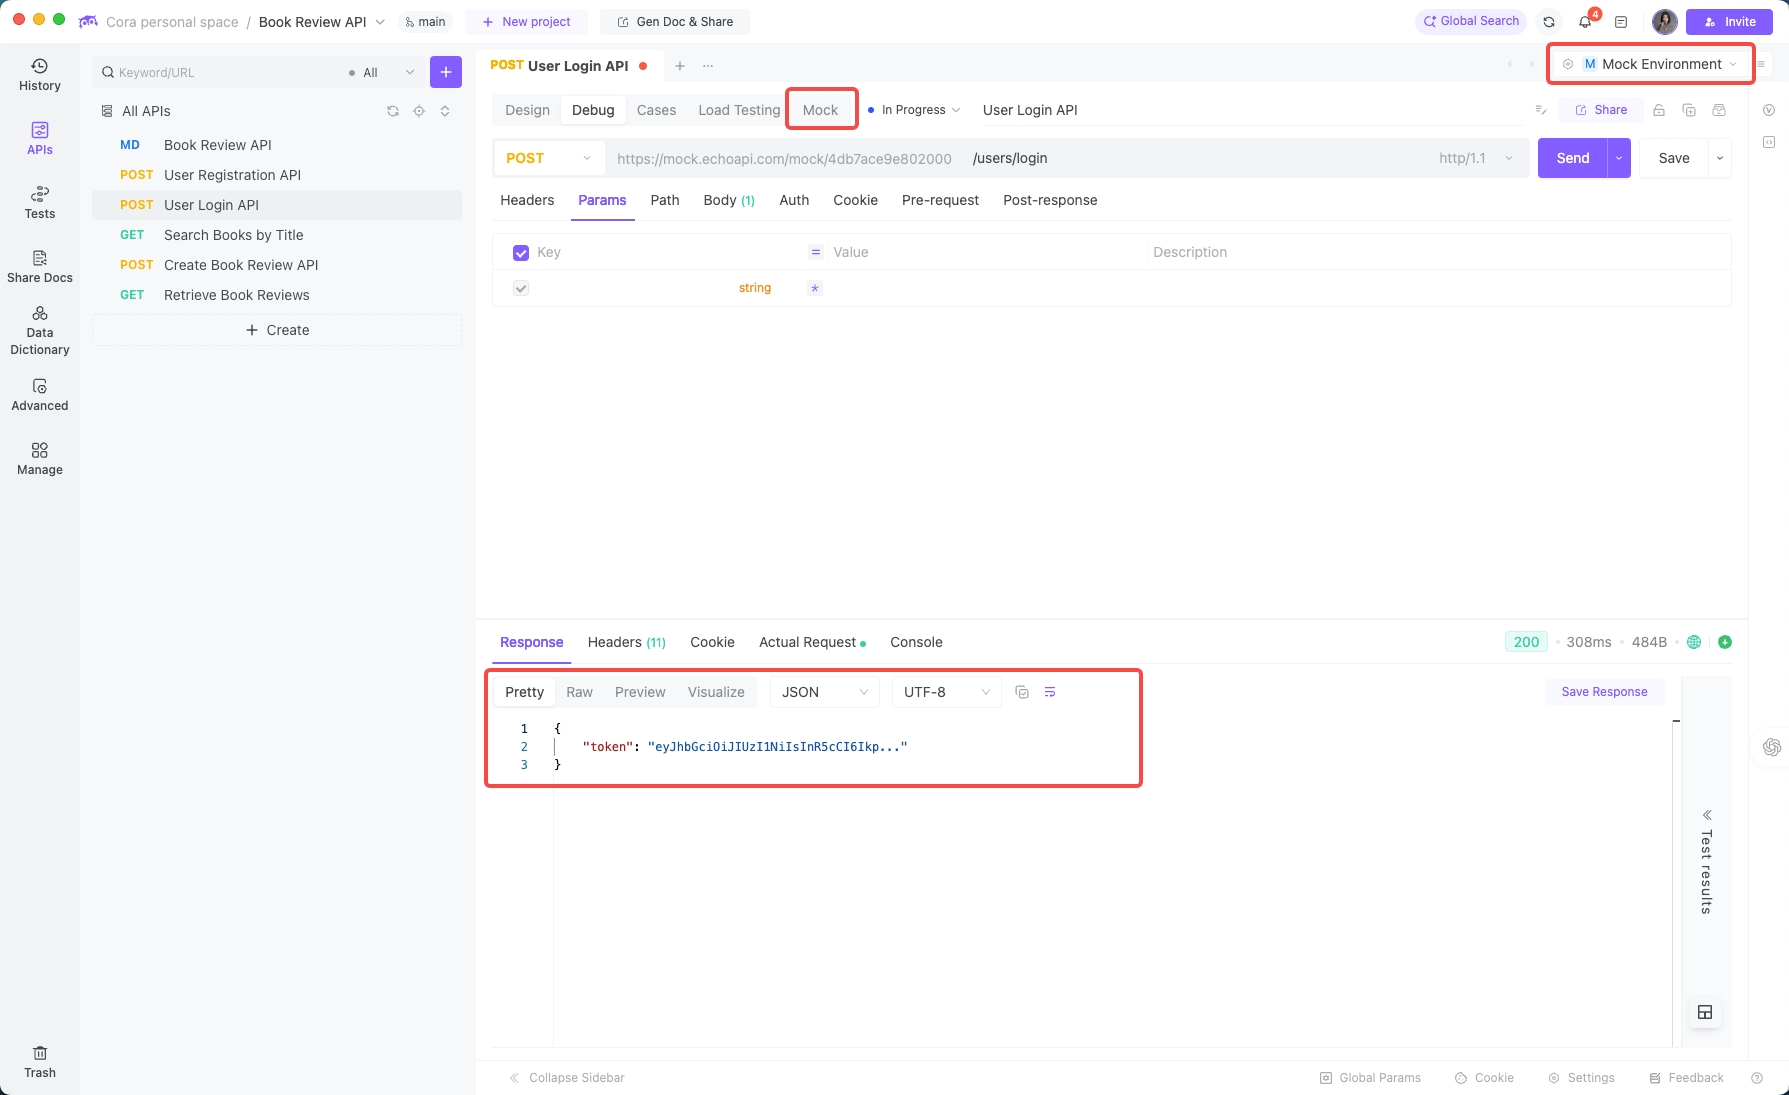
It also produces beautiful, well-organized API documentation, so your team and external developers can understand and integrate your API effortlessly.
3. Code Generation & IntelliJ IDEA Integration
EchoAPI integrates directly with IntelliJ IDEA. It can detect existing endpoint code in your project, generate API definitions automatically, and let you tweak or extend endpoints without leaving the editor.
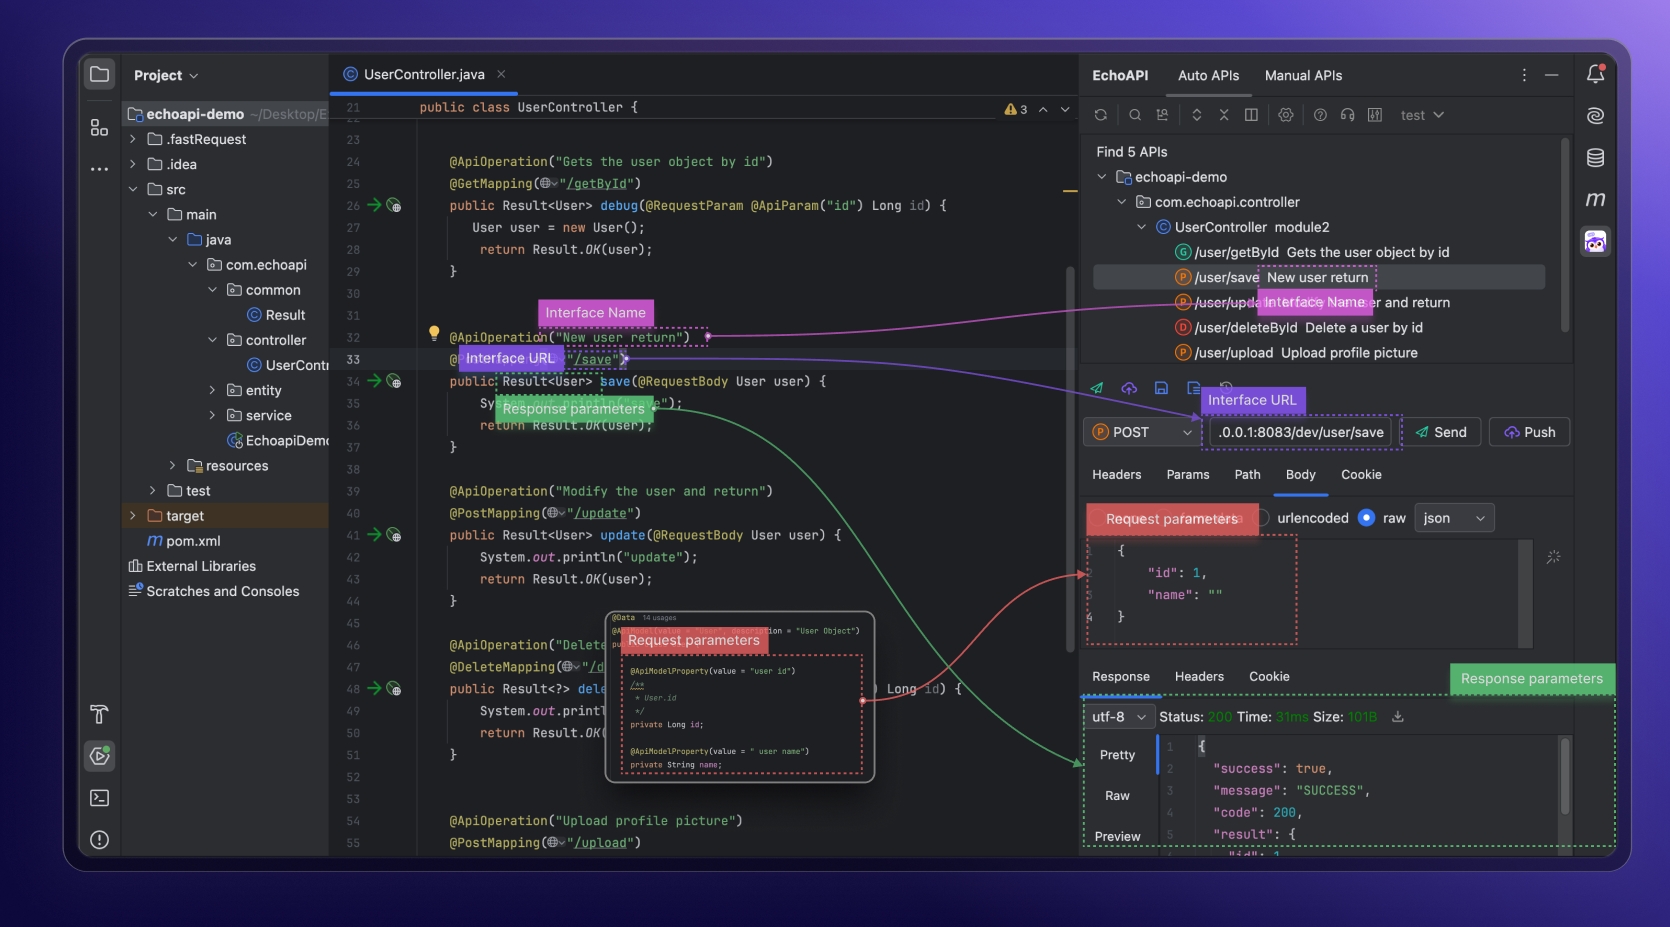
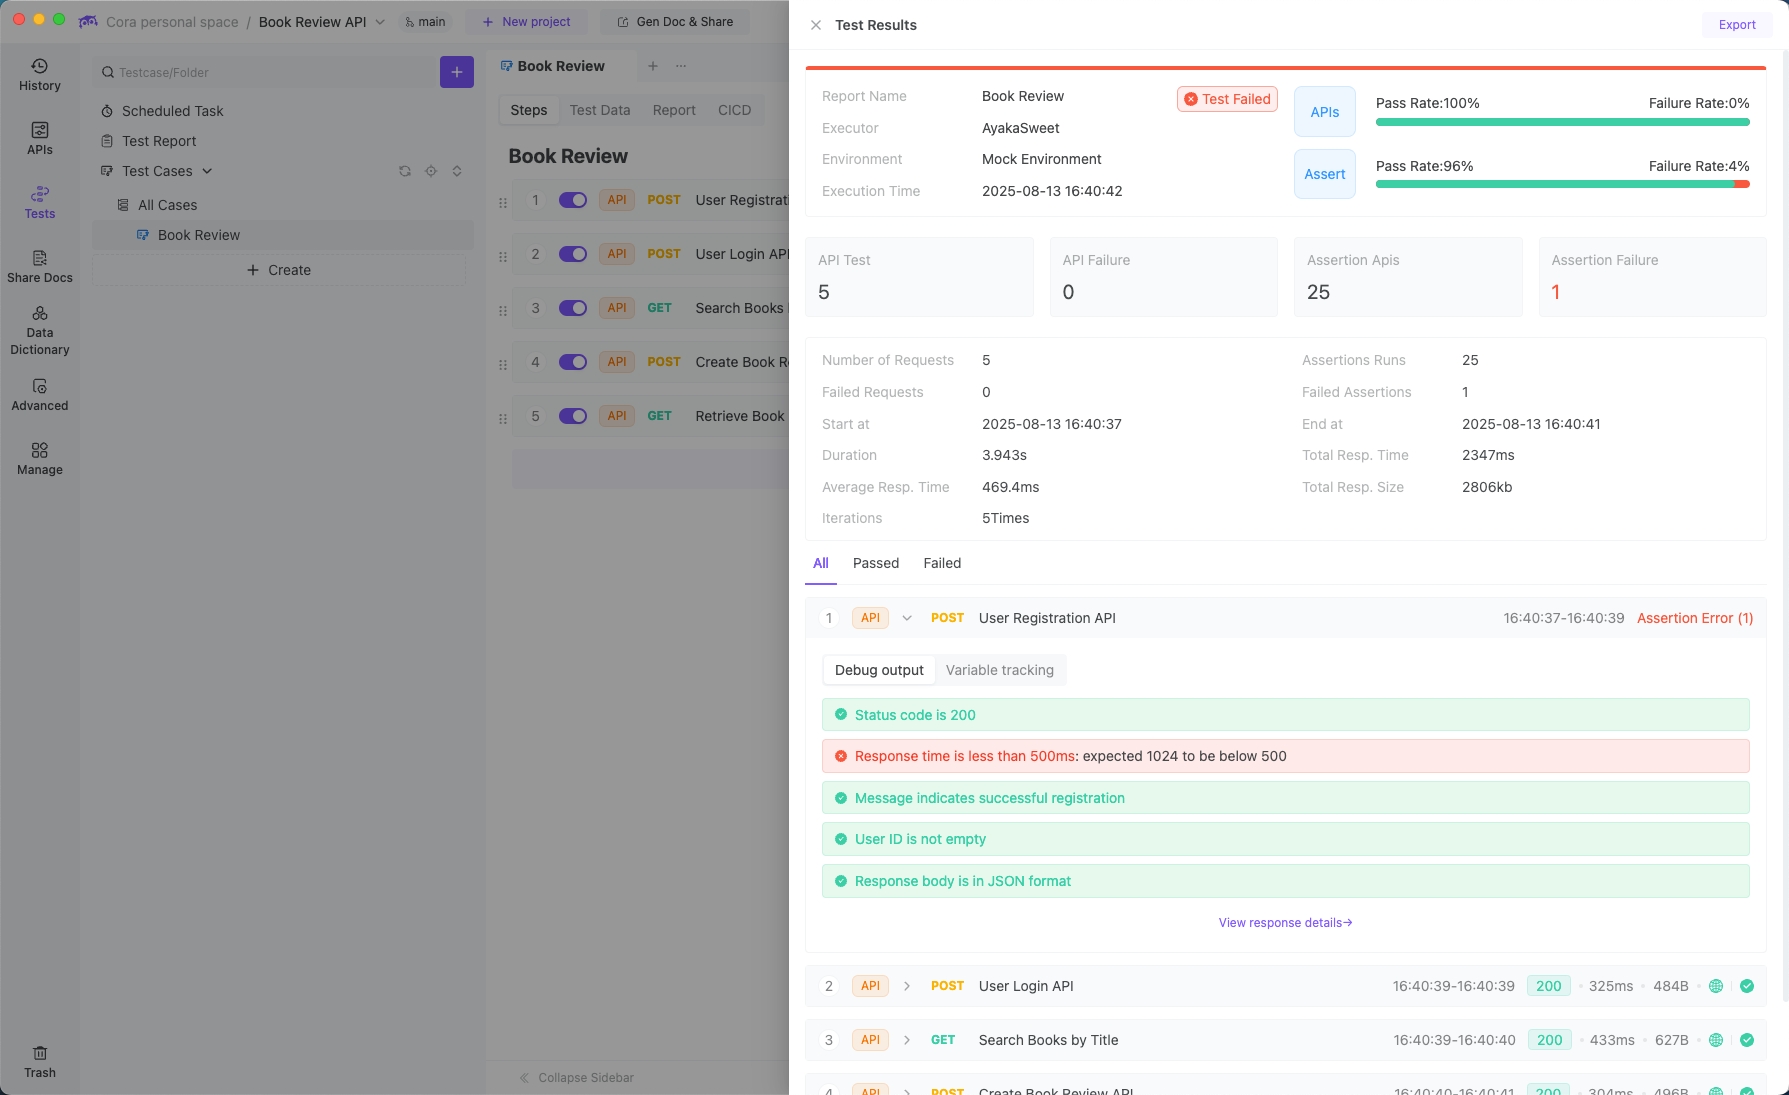
Even better, endpoints can sync in real time with EchoAPI, giving you centralized management, seamless team sharing, and the ability to run automated tests to ensure everything works before deployment.
Why developers love it:
- One platform for planning, designing, testing, and documentation
- Reduces context switching between multiple tools
- Speeds up development while improving consistency
- Makes collaboration and API maintenance effortless
Conclusion: Streamlining the API Development Process
Building an API may seem complex at first, but breaking it down into clear steps — from requirement analysis to deployment — makes the process much more manageable. Whether you’re creating a simple Book Review API or a sophisticated enterprise system, following a structured approach ensures your API is functional, scalable, and secure.
Modern tools like EchoAPI take this simplicity even further. From requirements gathering and API design to code generation and deployment, EchoAPI serves as an all-in-one platform, eliminating the need to juggle multiple tools. With seamless integration into IDEs like IntelliJ IDEA and auto-generated, well-organized API documentation, you can focus on what really matters — the core logic and functionality of your API — instead of repetitive, time-consuming tasks.
As APIs continue to drive modern software development, adopting tools that streamline the workflow doesn’t just save time — it boosts productivity, improves consistency, and ensures your APIs are secure, maintainable, and high-quality. If you’re ready to elevate your API development, integrating EchoAPI into your workflow is a smart, efficient, and future-proof choice.
Keep coding, keep innovating, and keep building the future — one powerful, scalable API at a time!


 EchoAPI for VS Code

 EchoAPI for IntelliJ IDEA

 EchoAPl-Interceptor

 EchoAPl CLI
 EchoAPI Client
 API Design
 API Debug
 API Documentation
 Mock Server


